Skip to content
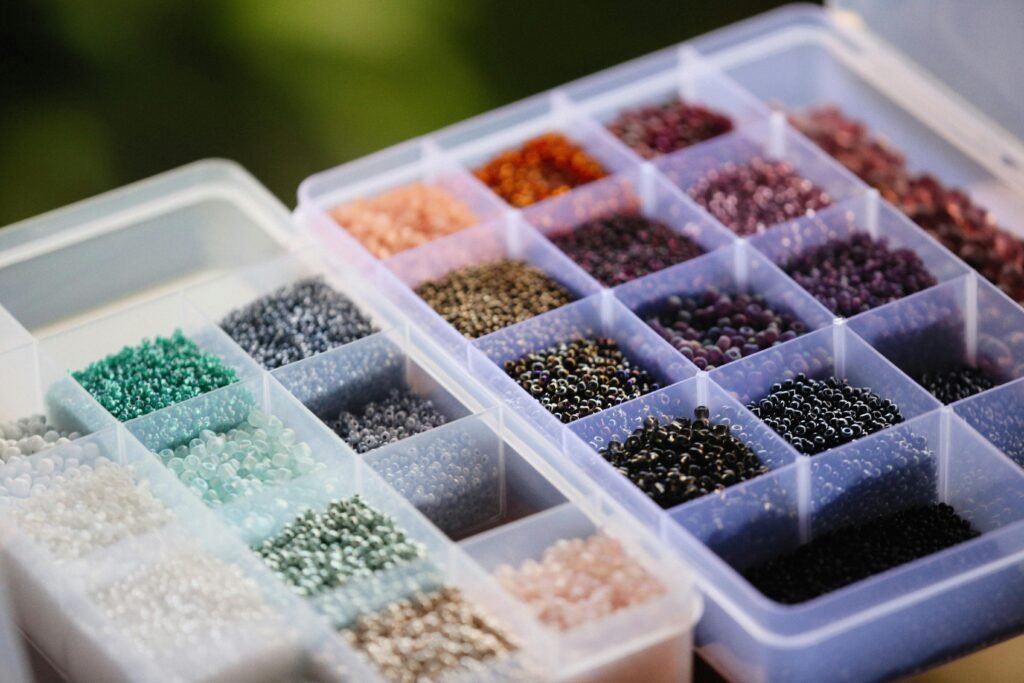
If you love crafting like me, you know how hard it is to keep everything organized. Crafting should be fun, not stressful. Luckily, with the right craft organization ideas, you can make your space both beautiful and functional.
Whether you have a big craft room or just a small corner, this post has you covered. We’ll explore everything from clear storage bins to wall-mounted solutions. Let’s turn your crafting area into a place that sparks creativity and joy.

Key Takeaways
- Achieve an organized craft space with dedicated storage solutions.
- Use clear bins to store and easily locate craft materials.
- Create a dedicated crafting area for more effective organization.
- Regularly declutter to maintain an organized and stress-free environment.
- Utilize vertical and wall spaces for additional storage opportunities.
Create a Dedicated Craft Space
Having a dedicated crafting area boosts your productivity and fun. Start by finding the perfect spot in your home. Look for a corner with plenty of natural light, but not too bright. Soft lighting helps you focus and keeps your eyes comfortable.
Think about how easy it is to get to your crafting space. It should be close and have enough room to move. This keeps you from feeling cramped and lets you organize all your tools. Make sure the space shows off your style while being practical. Organize your supplies in a way that’s neat but also reflects your unique taste.
Here’s a simple comparison to help you choose the ideal location within your home:
| Location | Pros | Cons |
|---|---|---|
| Living Room Corner | Good natural lightEasy access | May lack privacyCan be noisy |
| Spare Bedroom | More privacyLess noise | May need artificial lightingLess foot traffic |
| Basement | Ample spaceQuiet environment | Possibly less lightMay feel isolated |
Finally, make your crafting area your own with decor that sparks your creativity. Add vibrant art, organized shelves, or comfy chairs. Your space should be a place where you feel inspired and ready to create.
Using Clear Bins for Storage
Clear bin organizers can change how you store and find your craft supplies. They make your space look neat and work better. This makes crafting more fun and efficient.
Benefits of Clear Bins
Clear bins are great because you can see what’s inside without opening them. This saves time and lets you focus on your craft. Plus, many can stack, saving space and keeping things tidy.
Types of Clear Bins
Not all clear bins are the same. You need to pick the right one for your needs:
- Stackable Drawer Units: Great for small items, keeping everything organized and easy to find.
- Lidded Containers: Best for bigger items, keeping dust out and letting you see what’s inside.
- Portable Bins: Perfect for those who move around, with handles for easy carrying.
Labeling Your Bins
Even with clear bins, labels help a lot. Write what’s in each bin clearly. This makes finding things faster and keeps everything in its place.
Choosing the right bins and labeling them well makes your craft space better. It becomes organized, efficient, and inspiring, helping your creativity grow.
Using Shelves and Racks Efficiently
Craft shelving solutions are great for using vertical space well, especially in small areas. Adjustable units and modular systems let you customize your storage. For example, adjustable shelves can be moved to fit different-sized items, making them flexible.
Racks are a smart way to organize with racks, making it easy to find what you need. Mixing shelves and racks can change a room, turning it into a tidy space. Think about how often you use things and their size when planning storage. This helps you find the best spot for each item, making things more efficient.
Modular systems are also a top choice for craft storage. They let you build a storage solution that fits your space perfectly. They’re great for crafters who need storage that can grow with their needs. Here are some popular options:
| Type | Features | Best For |
|---|---|---|
| Adjustable Shelves | Repositionable shelves to fit different items | Variable-sized supplies |
| Modular Systems | Customizable components for tailored storage | Scalable and flexible storage needs |
| Wall-Mounted Racks | Utilizes vertical space efficiently | Frequently accessed items |
| Stackable Drawers | Compact and layers for optimal use of space | Small supplies and tools |
Using these craft shelving solutions can make your storage more efficient and your crafting space more enjoyable. The secret to good organizing is finding a balance between easy access and enough space. This way, every item has its own spot.
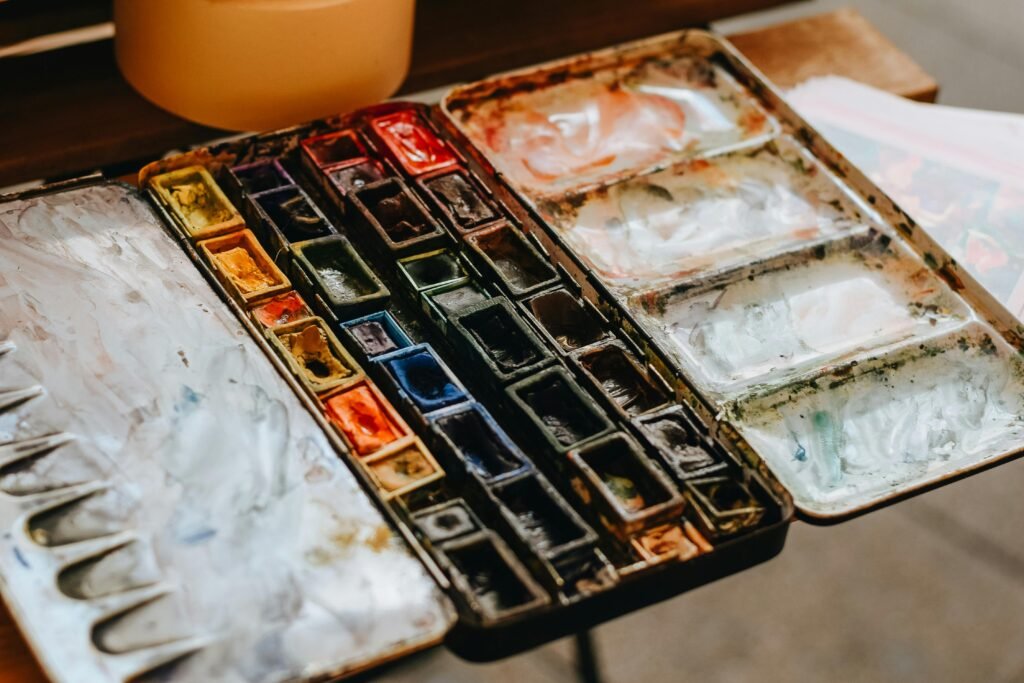
Organize by Craft Type
Organizing your craft supplies by type is a game-changer for any crafter. By applying proper craft supply categorizationand establishing specific craft type zones, you can streamline your creative process. This makes your craft organization systems more efficient.
Sorting Supplies by Category
Start by sorting through your supplies and grouping them into broad categories like painting, sewing, or papercraft. This initial step of craft supply categorization makes it easier to find what you need when you need it. For example, gather all your painting supplies—brushes, paints, and canvases—into one pile.
Do the same for sewing supplies, such as threads, needles, and fabrics. This approach prevents the frustration of rummaging through mixed items.
- Identify the main categories of your supplies.
- Group items that belong to each category.
- Label each group for quick identification.
Creating Zones for Different Crafts
Once you’ve sorted your supplies, creating distinct craft type zones within your craft space ensures that everything for a specific project is in one accessible spot. This method not only keeps your area tidy but also makes it easier to switch from one craft to another without hassle.
For example, dedicate one corner of your room to painting, another to sewing, and a different section for papercrafts. These distinct zones prevent cross-contamination of supplies and keep your workspace organized and efficient.
By implementing these craft organization systems, you’ll see a significant improvement in how swiftly and enjoyably you can begin any creative project.
How to Organize Craft Supplies: My Step-by-Step Guide
Starting to organize your craft supplies might feel overwhelming. But, with a simple guide, you can turn your workspace into a creative space you love. Let’s go through the steps to make your supplies easy to find and organized.
Decluttering First
First, let’s tackle the key to any organization plan; decluttering! Begin by sorting through all your supplies and getting rid of what you don’t need or use. This step is so important so you see what you actually have and don’t need. Be honest with yourself about what you’ll likely use in the future.
Grouping Similar Items Together
After decluttering, it’s time to group craft items by type. Sorting supplies into categories makes it easier to find what you need. You might group items like paints with brushes, fabrics with threads, and paper with stamps. This way, everything has its place, reducing the chance of losing things.
Storing Frequently Used Items Within Reach
Lastly, make sure your most used supplies are accessible craft supplies. Items you use often should be easy to get to. Use clear bins, labeled shelves, or tabletop organizers for quick access. This not only saves time but keeps your creative flow going.
By following these steps, you can turn a cluttered craft area into a well-organized, inspiring space. Happy crafting!
Utilizing Wall Space for Storage
Making the most of wall space can really help with craft organization. It doesn’t matter if you have a small area or a big craft room. Using wall storage can clear up floor and desk space. Let’s look at some good ways to do it.
Installing Pegboards
Craft pegboards are one of my favorite ways to organize all my craft supplies and it keeps everything within reach. First, pick a strong board and attach it to your wall. Make sure it can hold the weight of your tools and materials.

After setting it up, you can add hooks, shelves, and baskets. These can hold scissors, rulers, and more. The best part is, you can change it up as your collection grows.
Hanging Baskets
Baskets and hooks are perfect for wall storage. They help keep small items like paint tubes and ribbons organized. Choose sturdy baskets that fit your craft room’s style.
Utilizing Hooks and Rods
Hooks and rods are very flexible for storage. They’re great for hanging tools, fabrics, or finished projects. A rod can also hold bins or clips. Just make sure everything is easy to reach and securely hung.
| Item | Best Used For |
|---|---|
| Pegboards | Customizable tool and material storage |
| Hanging Baskets | Small items like ribbons and paint tubes |
| Hooks & Rods | Tools, fabrics, hanging bins |
Using these methods can make your craft room more efficient. Whether you pick pegboards, baskets, or a mix, your wall storage will be key to your creativity.
Using Drawer Organizers
Well-organized craft drawers make your creative work smoother and more fun. Craft drawer dividers come in many shapes and sizes. They help you organize your space efficiently. This keeps your area clutter-free, making it easier to find what you need when you need it.
Let’s look at the different types of craft drawer dividers. You can pick adjustable dividers to fit your supplies or pre-sized ones for specific items. The right dividers can turn messy drawers into neat, organized spaces.
Here is a comparison of common drawer organization solutions:
| Type of Organizer | Features | Best For |
|---|---|---|
| Adjustable Dividers | Flexible, customizable sections | Variety of craft supplies |
| Pre-Sized Compartments | Fixed sections, specialized for certain items | Specific supplies like beads and buttons |
| Tray Organizers | Flat trays with multiple compartments | Stationery, small tools |
| Drawer Inserts | Non-slip base, stackable | Miscellaneous items |
Organizing your craft drawers is easier than you think. Begin by sorting your supplies and picking the right organizers. Whether you choose adjustable dividers for flexibility or pre-sized ones for specific items, they all help keep your space tidy. With careful planning and the right organizer, your craft supplies will stay organized and easy to find.
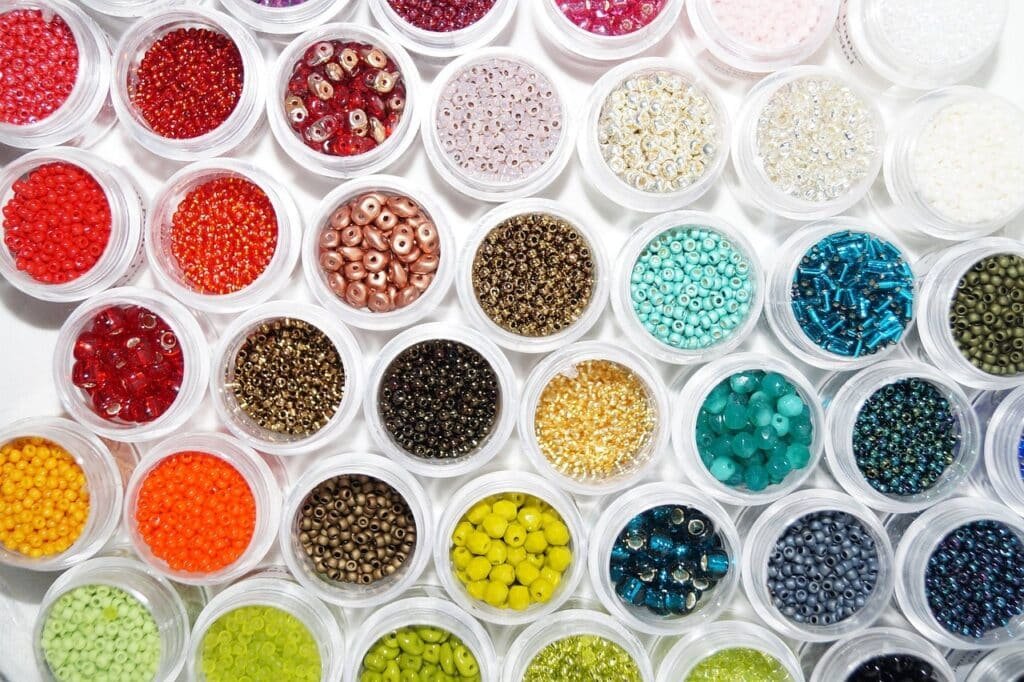
Storing Small Items in Jars
In my craft room, jars are key for keeping small items tidy. They’re clear, easy to reach, and look good. Let’s explore how to sort, pick the right sizes, and label them well.
Categorizing Small Items
Sorting items in jars is both handy and pretty. I group things like beads, buttons, ribbons, yarn, and threads together. This makes finding what I need fast. Using smart craft labeling strategies helps me spot each group easily.
Choosing the Right Jar Sizes
Picking the right jar sizes is key for a neat craft area. Small jars are best for tiny things like sequins or pins. Big jars hold more, like rolls of ribbon or thread. The jar size should match the item amount.
Labeling Your Jars for Easy Identification
Good labeling is the heart of strong jar storage systems. I pick labels that pop, so each jar is easy to read. Mixing print labels with handwritten tags adds a personal flair, making it simple to know what’s inside.
| Item | Jar Size | Labeling Strategy |
|---|---|---|
| Beads | Small | Handwritten tags |
| Buttons | Medium | Print labels |
| Ribbons | Large | Color-coded labels |
| Threads | Medium | Handwritten tags |
By sorting, choosing the right jars, and labeling well, you can make your craft space neat and inspiring. Jar storage systems are not just useful but also add beauty to your space.
Repurposing Household Items for Craft Storage
Turning household items into craft storage is good for the planet and your wallet. I’ve found many ways to reuse items around the house. Here are some top ideas for upcycling storage in your craft area.
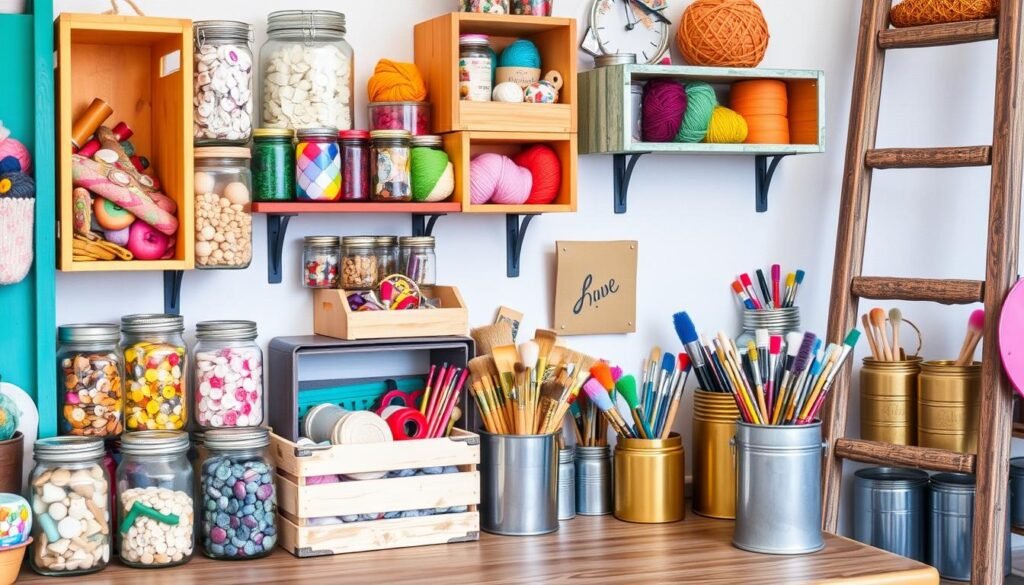
Egg cartons are great for DIY craft organizers. They can hold small items like beads and buttons. Each section of an egg carton is a handy compartment for keeping things tidy.
Old spice racks are also a smart choice. They’re perfect for storing thread spools or glitter jars. With a little creativity, a spice rack can become a useful and stylish organizer.
Don’t ignore old furniture. An unused dresser, for example, can be revamped. Add some paint and new knobs, and it becomes a fantastic craft supply storage piece. Each drawer can hold different supplies, making it a great addition to your workspace.
| Household Item | Usage Idea | Benefits |
|---|---|---|
| Egg Cartons | Organizing small items like buttons and beads | Easy compartmentalization and eco-friendly |
| Spice Racks | Holding spools of thread or small jars | Compact and accessible, saves space |
| Old Dressers | Storage unit for various craft supplies | Ample space, customizable, and visually appealing |
There are many ways to use upcycling for storage. Turning everyday items into creative storage solutions keeps your supplies organized. It also adds a personal touch to your craft space. So, think twice before throwing away household items. They might become DIY craft organizers in your next project.
Creating a Mobile Craft Station
For crafters who share spaces or like flexibility, a craft station on wheels is perfect. It keeps everything organized and mobile. This way, you can be creative anywhere in your home!
Choosing the Right Cart
Picking the right cart is key for a good mobile craft station. Here are some important things to think about:
- Size: Make sure the cart is big enough for your supplies but not too heavy to move.
- Durability: Go for carts made of metal or heavy-duty plastic for lasting use.
- Compartmentalization: Look for carts with lots of shelves, drawers, and spots to keep things tidy.
Organizing Your Cart
After picking the right cart, it’s time to organize it well. Here’s how to start:
- Sort Supplies: Put similar items together. For example, keep all your brushes in one spot and paints in another.
- Accessibility: Put things you use a lot on the top shelf. Less used items go on the bottom.
- Labeling: Use labels to mark where each item goes. This makes your cart organized and helps you find things fast.
This way, your mobile craft cart stays organized and useful. It lets your creativity flow without being stopped by mess or disorganization.
Maintaining an Organized Craft Space
Keeping your craft space tidy is a continuous effort. It needs dedication and a solid plan. Here are some tips to keep your space organized and creative.
Regular Cleaning Routine
Cleaning your craft area regularly is key. It stops clutter from growing and keeps your space clean. Set aside time each week to organize, put away tools, and clean surfaces.
Keeping a Donation Box Handy
It’s easy to collect too many supplies as a crafter. Having a donation box helps you get rid of unused items. This keeps your space tidy and helps others in your community.
Re-evaluating Your Storage Solutions
It’s important to check your storage often. As you get new supplies, your storage might need updates. Review your storage to see if it still works for you. A small tweak can make a big difference in keeping your space organized.
Conclusion
As we wrap up our exploration of crafting organization, it’s clear that a well-organized space is key. Setting up a dedicated area for crafting, using clear bins and shelves, and getting creative with household items can change the game. These solutions make sure everything is easy to find, helping us stay calm and focused.
Keeping our creative space tidy isn’t just about looks; it boosts our productivity and happiness. Sorting supplies, using clever wall storage, or having a mobile craft station all help. Each step makes crafting more fun and efficient.
Remember, keeping your crafting area organized is a continuous effort. Regularly check and tweak your storage to keep up with your changing needs. This way, we maintain a clutter-free, joyful, and highly functional space. Let’s apply these tips and enjoy the peace and satisfaction of a well-organized crafting haven.
FAQ
What are some effective craft organization ideas for small spaces?
Use vertical storage like shelves and racks to save space. Clear bins help you see what’s inside. Repurpose items and create a mobile station for a tidy space.
How can I create a dedicated crafting area in my home?
Find a spot with good light and easy access. It could be a spare room or a corner. Make it reflect your style and keep it functional for your needs.
What are the benefits of using clear bins for storage?
Clear bins let you see what’s inside without opening them. They save space and keep things organized. Labels make them even more useful.
How can I efficiently use shelves and racks for craft storage?
Shelves and racks use vertical space well. Choose adjustable or modular systems that fit your needs. Think about how often you use your items to set up your shelves.
What is the best way to organize craft supplies by type?
Sort supplies into categories like painting or sewing. Then, organize within those groups. This keeps supplies separate and makes projects easier to set up.
What steps should I follow to declutter my craft supplies?
Begin by getting rid of items you don’t use. Group similar items together. Store your most used supplies where you can reach them easily.
How do I utilize wall space for craft storage?
Use pegboards, baskets, and hooks to make the most of wall space. This keeps tools and materials organized and within reach.
What are the best practices for using drawer organizers in craft storage?
Choose organizers that fit your drawers and supplies. Arrange items so the most used ones are easy to find.
Why should I use jars for storing small craft items?
Jars are useful and look good. They help you see and organize small items. Labeling and displaying jars can also decorate your space.
How can I repurpose household items for craft storage?
Upcycle items like egg cartons or old furniture for storage. Look around your home for things you can turn into useful organizers.
What are the benefits of creating a mobile craft station?
A mobile station is flexible and convenient. Choose a cart that fits your needs. Organize it with essentials for easy setup anywhere.
How can I maintain an organized craft space?
Keep a regular cleaning schedule and have a donation box. Re-evaluate your storage solutions often. This keeps your space tidy and adaptable to your needs.