Skip to content
 Are you interested in learning the art of macramé?
You’ll need to know a few basic knots to get started. The good news? They’re super easy to learn, and once you’ve got them down, you can make all kinds of cool projects—plant hangers, wall hangings, keychains, you name it.
In this post, I’ll walk you through five basic macramé knots, step by step. No fancy skills needed—just some cord and a little patience.

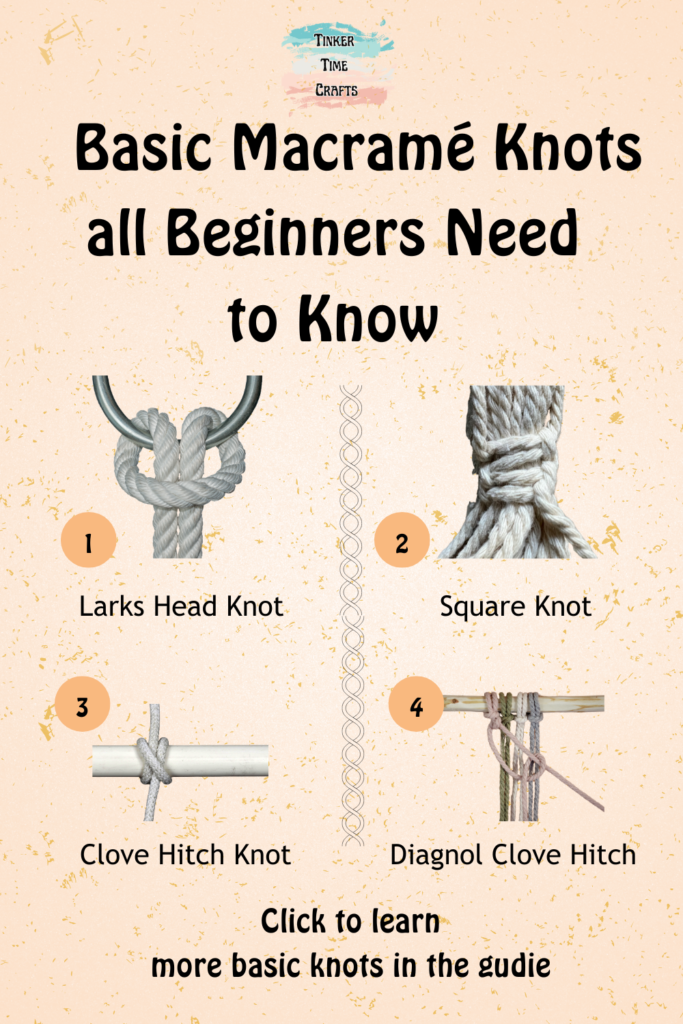
The Basic Macramé Knots You Need to Know
Lark’s Head Knot (Used for attaching cords to a dowel or ring)
Common Use: Attaching cords to your macramé project.
How to Tie It:
- Fold your cord in half to create a loop.
- Place the loop over a dowel, ring, or rod.
- Pull the two loose ends through the loop.
- Tighten by pulling down on both ends.
Tip: This is the most common way to start a macramé project!
2. Clove Hitch (Used for diagonal or horizontal patterns)
Common Use: Creating curved or diagonal designs in macramé.
How to Tie It:
- Take a working cord and wrap it over and around a holding cord.
- Pull the end through the loop you just made and tighten.
- Repeat once more to form a second loop.
- Pull both loops snug against each other.
Tip: When done in sequence, it creates beautiful diagonal or horizontal lines.
3. Vertical Clove Hitch (Used for vertical patterns)
Common Use: Making vertical ridges in macramé.
How to Tie It:
- Hold the anchor cord vertically.
- Take your working cord and wrap it over and around the anchor cord.
- Pull it through the loop you just created.
- Repeat one more time to secure the knot.
- Slide the knots up to keep them snug.
Tip: This creates a structured, woven effect and is great for wall hangings.
4. Half Knot (The foundation of the spiral knot)
Common Use: Making spirals or decorative accents.
How to Tie It:
- Use two working cords and two anchor cords.
- Take the left cord, pass it over the two anchor cords and under the right cord.
- Take the right cord, pass it under the two anchor cords and through the loop created on the left side.
- Pull tight.
Tip: Repeating this knot multiple times in the same direction creates a twisted spiral knot.
5. Square Knot (One of the most commonly used knots)
Common Use: Adding texture and structure.
How to Tie It:
- Start with four strands: two outer working cords and two inner anchor cords.
- Step 1: Take the left working cord, pass it over the two middle anchor cords and under the right working cord.
- Take the right working cord, pass it under the anchor cords and through the loop created on the left side.
- Pull tight.
- Step 2: Reverse the process.
- Take the right working cord, pass it over the anchor cords and under the left working cord.
- Take the left working cord, pass it under the anchor cords and through the loop on the right side.
- Pull tight.
Tip: This creates a flat, even knot. Repeating it in a row makes a square knot pattern, and leaving spaces between knots creates a net-like effect.
If you learn those knots, you will be off to a great start and be able to create several projects.
Whats the Difference in Macramé Cord, Macramé Rope, and Rope?
Now you may be wondering what exactly you should use when creating Macramé designs? Can you use regular rope? My first project was created with regular rope from the hardware store and needless to say, the result was not all that great. Not only was it really unpleasant to work with but it just didn’t hold the knots or look good.
Let’s make sure you don’t make the same mistake.
Macramé Cord
Structure: A single strand or loosely twisted fiber
Texture: Soft, smooth, and flexible
Best For:
- Detailed knots and designs
- Small or intricate macramé projects (jewelry, wall hangings, plant hangers)
- Easier on the hands while working
Unraveling Effect: When brushed out, it creates a fringe or fluffy texture, making it great for feather or tassel designs.
Macramé Rope
Structure: Three or more twisted strands (usually 3-ply)
Texture: Slightly rougher and more structured
Best For:
- Large, sturdy projects (hammocks, thick wall hangings, rugs)
- Holds knots well but is harder to undo
- Has a more textured, rustic look
Unraveling Effect: When untwisted, it creates a wavy, crimped look rather than a fluffy fringe.
Those are the only items you should be using for Macramé. Leave the regular rope at the hardware store. lol
From cord types and sizes to essential tools like scissors, measuring tape, and macramé boards, I’ve put together a complete guide to help you get started.
Check out my detailed guide on the best macramé cords and tools where I break down different materials, textures, and must-have supplies so you can create with confidence.
Wrapping It Up
Now that you’ve got the basic macramé knots down, you’re ready to put them to use!
Whether you’re making a boho plant hanger, a stylish wall hanging, or a cute keychain, these knots are the foundation of every great macramé project.
Want to start creating?Check out my beginner-friendly macramé projects for step-by-step tutorials to turn these knots into beautiful handmade designs!