 Skip to content
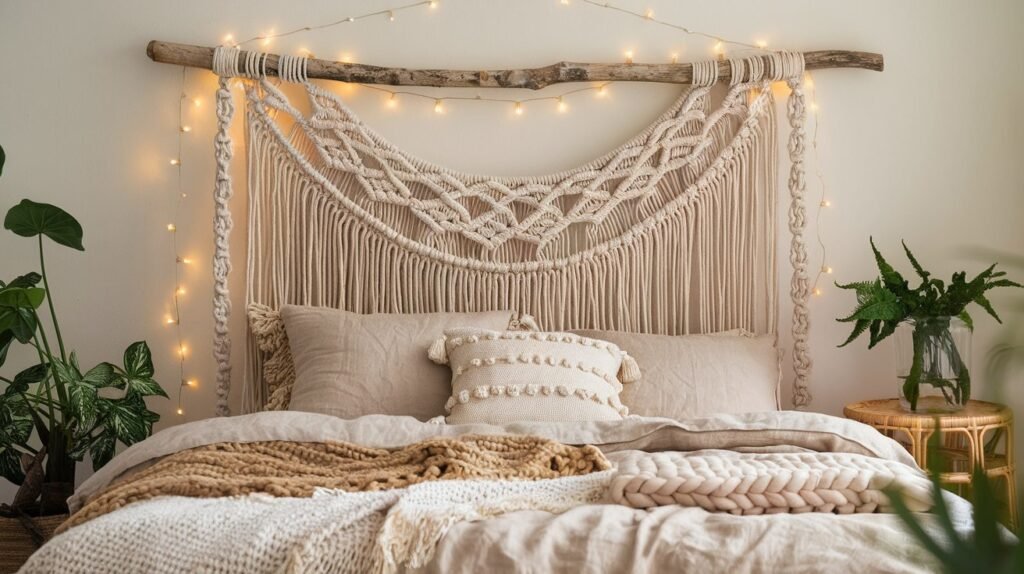
 Looking to add a touch of bohemian charm to your bedroom without breaking the bank? A DIY macramé headboard is an easy and stylish way to create a cozy, laid-back vibe. This project is perfect for beginners, and the best part? No power tools required!
Materials You’ll Need:
- A wooden dowel or curtain rod (about the width of your bed)
- Macramé cord or thick cotton rope
- Scissors
- Measuring tape
- Hooks or sturdy rope for hanging
- Optional: Wooden beads, tassels, or dip-dye supplies for added flair
Step-by-Step Instructions for a Macramé Headboard
1. Measure and Cut Your Cord
Decide how long you want your headboard to be and cut multiple strands of macramé cord to twice that length. For a fuller look, use more strands.
2. Attach the Cord to the Dowel
Use lark’s head knots to secure each strand evenly along the dowel. This will form the base of your design.
3. Create Your Pattern
Experiment with different macramé knots, such as:
- Square knots for a classic look
- Diagonal clove hitches for a cascading effect
- Looped fringe for a relaxed, free-flowing style
Don’t worry if you’re new to macramé—there are plenty of easy tutorials online to guide you!
4. Customize Your Headboard
Make it uniquely yours by:
- Adding wooden beads to the strands for an earthy feel
- Dip-dyeing the ends in a soft pastel or earthy tone
- Attaching tassels or feathers for extra texture
5. Hang It Up
Secure the dowel to the wall above your bed using sturdy hooks or suspend it from a decorative rope for a true boho effect.

Styling Tips for Your Boho Headboard
- Pair with neutral or earthy-toned bedding to enhance the relaxed vibe
- Add fairy lights or LED string lights for a dreamy, cozy glow
- Decorate with hanging plants or dried flowers to complete the boho look
Final Thoughts
This DIY macramé headboard is a simple and affordable way to transform your bedroom into a stylish bohemian retreat. Whether you’re an experienced macramé artist or just starting out, this project is fun, creative, and completely customizable.
Are you ready to try it? Let me know in the comments what design you’d go for or if you tried this out. Happy crafting!

