Skip to content
 DIY Stationary Ideas for Creative Personal Touches
Want to add a personal touch to your letters? DIY stationery is the way to go! Making your own stationery lets you express your personality in every note. It’s perfect for special occasions or just to make your everyday mail stand out.
Choosing the right materials and learning new skills like calligraphy can be fun. It opens up a world of possibilities for your stationery. You can make your letters truly unique.
Key Takeaways
- Explore diverse DIY stationary projects for a personal touch.
- Homemade stationery designs make your correspondence unique.
- Learn to craft personalized letterheads, envelopes, and cards.
- Select materials that best represent your style and taste.
- Employ various techniques like calligraphy and watercolor for added flair.
Introduction to DIY Stationary
Making your own stationery is incredibly fulfilling. It lets me add a personal touch to every letter or note. In today’s fast-paced digital world, getting a handmade message is truly special. It shows the sender’s care and effort.
Trying out different paper crafting techniques is very rewarding. From embossing to stamping, each method makes my stationery unique. Mastering these techniques gives me a sense of pride and accomplishment.
Using artistic letter-writing essentials turns simple paper into art. Think of customized letterheads, homemade envelopes, and beautiful calligraphy. Each detail makes the correspondence memorable and precious.
The trend of personalizing messages is on the rise, and it’s for a good reason. Crafting stationery at home is not just about looks; it’s also calming. It helps reduce stress, promotes relaxation, and boosts creativity.
Handmade stationery creates a deep connection. It’s a hobby that lets me express my creativity and share real emotions. If you want to make your messages more special, try making your own DIY stationery.
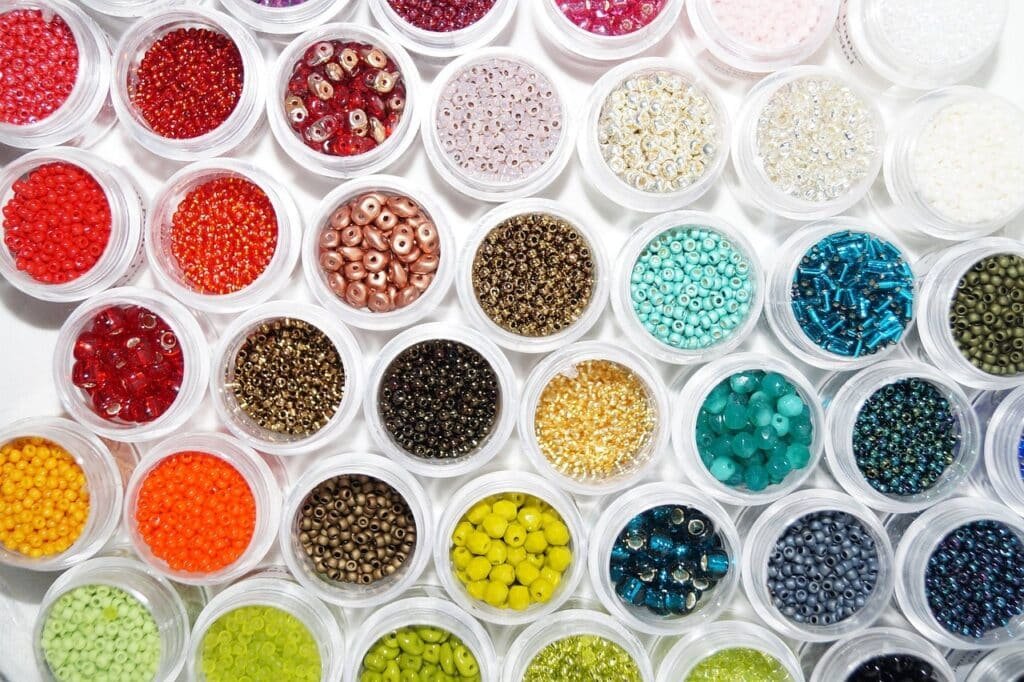
Basic Tools and Materials for DIY Stationary
Starting with DIY stationery? You’ll need the right tools and supplies. These will help you make professional-looking projects. They add a personal and creative touch to your work.
Essential Tools
Having the right tools is key. You’ll need sharp scissors, a cutting mat, and a precise craft knife. An all-purpose adhesive, like double-sided tape or glue dots, is also essential. Rulers and stencils help with straight lines and designs.
Common Materials
The base of any DIY stationery project is the materials. You’ll need cardstock in different colors and textures. Also, specialty papers and envelopes that match your creations are a must. These supplies let you customize each piece to your style.
Optional Enhancements
Want to add more flair? Decorative stationery elements are the way to go. Washi tape, stamps, embossing powders, and stickers can make your stationery pop. Trying out these tools helps you create a unique look for your projects.
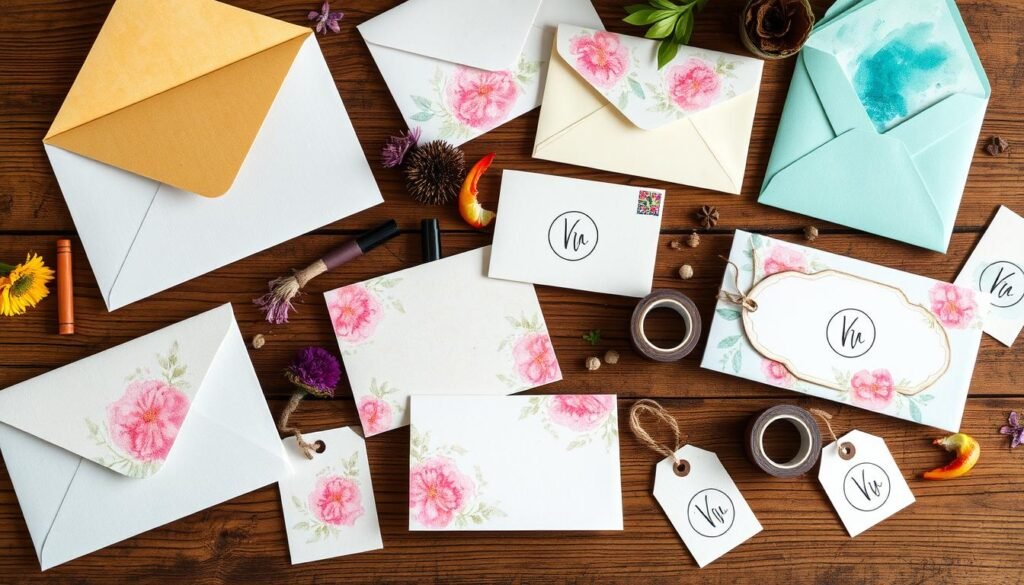
Creating Custom Envelopes
Creating custom envelopes is a great way to make your letters special. Handmade envelopes show off your style and make your messages stand out. Let’s explore this fun paper crafting journey together.
Choosing Your Paper
Picking the right paper is key in envelope design. Look for paper that’s 80-100 gsm for durability. Texture and patterns can show off your personality or the theme of your message. Using recycled or specialty papers adds a creative and eco-friendly touch.
Envelope Templates and Cutting
Envelope templates help you get the shape right. You can find them online or make your own. Trace the template onto your paper and cut it out with care. This ensures your envelope looks great.
Adding Decorative Elements
Decorating your envelopes makes them unique. Try adding liners for a surprise inside. Stamps, whether hand-carved or store-bought, add fun details. Artwork or calligraphy on the front takes your envelope to the next level.
Customizing your envelopes shows off your creativity and care. Paper crafting for correspondence improves your skills and brings happiness to your recipients. Your handmade envelopes will be a hit!
Designing Personalized Letterhead
Creating a custom letterhead design is a fun journey. It starts with picking the right fonts and layouts to show your style. Your letterhead is a part of your brand, so it’s key to choose elements that show who you are. Let’s explore how to design a personalized letterhead.
Selecting Fonts and Layouts
Fonts and layouts greatly affect your letterhead’s look. Think about the message you want to send with your typography. Serif fonts are traditional and official, while sans-serif fonts are modern and friendly.
The layout should be easy to read and look good. Make sure all important info is clear and easy to find.
Incorporating Graphics and Logos
Adding graphics, monograms, or logos can make your letterhead stand out. Choose graphics that match your brand’s style, whether it’s simple or detailed. Keep it balanced to avoid too much.
Place logos in spots like the top or bottom corners. This makes them noticeable but not too distracting.
Printing Your Letterhead
The last step is printing your letterhead. You can print at home if you have the right tools and paper. But, for a professional look, use printing services. They offer special touches like embossing or foil stamping.
This ensures your stationery looks polished and sophisticated.
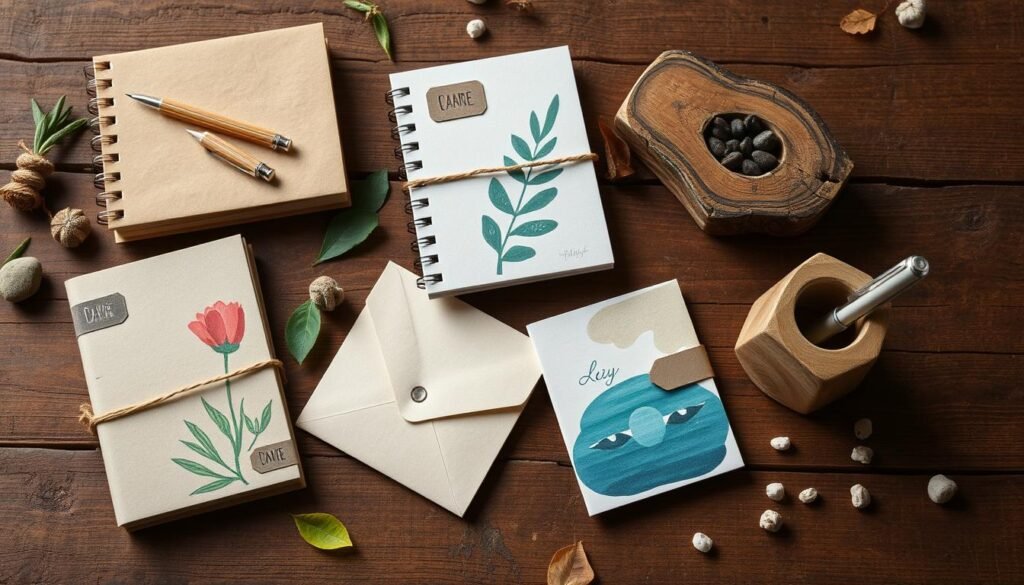
Handmade Cards for Special Occasions
Handmade cards are a unique way to celebrate birthdays, holidays, and anniversaries. They are perfect for both newbies and seasoned crafters. Making personalized cards is a fun and rewarding activity.
Cardstock Selection
Choosing the right cardstock is key for making personalized cards. The weight and texture of the cardstock greatly affect the card’s look and feel. Heavy cardstock is durable and feels premium, ideal for special events. Textured paper adds depth and interest.
Embellishments and Decorations
Adding embellishments and decorations makes your DIY cards extra special. Use ribbons, glitter, die-cuts, stickers, and stamps to add a personal touch. Mixing different elements creates a unique and eye-catching design.
Messages and Inscriptions
The heart of any greeting card is the message. Writing a heartfelt message lets you share your feelings. Take time to write a thoughtful note that will touch the recipient’s heart. Use calligraphy or unique fonts to make it even more special.
| Card Element | Suggestions |
|---|---|
| Cardstock | Heavy, Textured, Colored |
| Embellishments | Ribbons, Glitter, Die-cuts |
| Messages | Heartfelt, Personalized, Calligraphic |
By picking the right cardstock, adding creative decorations, and writing special messages, you make beautiful handmade cards. These cards will be treasured by their recipients. Explore the world of DIY greeting cards and let your creativity flourish!
DIY Stationary for Weddings
Making your own wedding stationery is a personal and rewarding project. You can create handmade invites, save-the-date cards, and thank you cards. Each piece becomes a special part of your wedding story.
Save-the-Date Cards
Your save-the-date cards introduce your wedding to your guests. They set the mood for what’s to come. If you enjoy crafting, DIY save-the-dates can be a fun project. Use quality cardstock, add personal photos, and think about adding vintage stamps or pressed flowers.
Invitations
Your wedding stationery ideas start with your invitations. They can be elegant or rustic, reflecting your style. Try calligraphy, embossed designs, or watercolor backgrounds to make them unique.
Thank You Cards
After your wedding, saying thank you to your guests is important. Personalized thank you cards can match your wedding’s style. Include a handwritten note and maybe a wedding photo to show your appreciation.
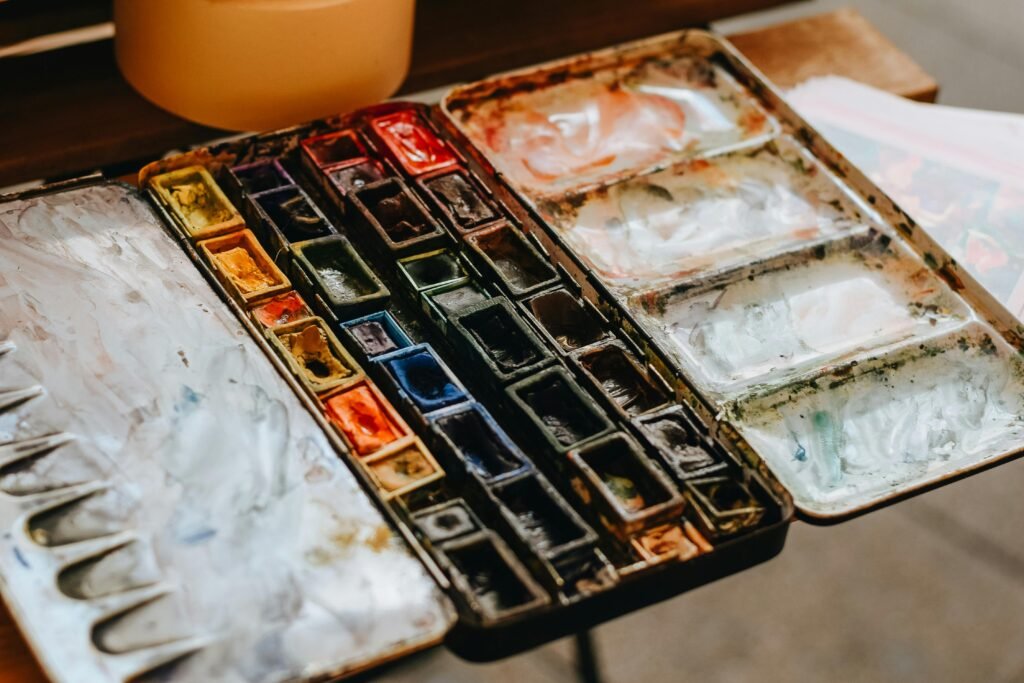
Adding Calligraphy to Your Stationary
Adding calligraphy to your stationery makes it personal and elegant. It turns simple cards and letters into beautiful keepsakes. This art form brings sophistication to your creations.
To begin, you’ll need basic tools: nibs, brushes, ink, and quality paper. There are many calligraphy styles to try:
- Italic: A classic and easy-to-read font for any occasion.
- Gothic: Perfect for dramatic effects with its bold strokes and details.
- Modern: A contemporary style that blends traditional elements.
Start with simple scripts to build confidence. Try different nibs and brushes to find your style. With practice, you’ll master elegant scripts that impress everyone.
Calligraphy makes every stationery piece special. Whether it’s wedding invites, thank-you cards, or personal letters. Your effort will bring joy to those who receive them.
Using Stamps and Stickers for a Unique Look
To make your DIY stationery stand out, mix creativity with practicality. Custom stationery stamps and unique sticker designs add a personal touch that’s unmatched.
DIY Stamps
Making your own stationery stamps is fun and adds a personal touch. You can create anything from simple shapes to detailed designs. To start, you’ll need carving tools, ink pads, and rubber.
- Stay steady while carving: Precision is key for a clean result.
- Stick with simple initial designs: Start with basic shapes or initials to get the hang of it.
- Use quality ink: Ensures your stamps last and print clearly on your stationery.
Creative Sticker Ideas
Stickers are a quick way to make your stationery pop. You can choose from simple designs or go all out with elaborate themes. Mixing bought and homemade stickers adds a special touch to your work.
“Stickers are the cherry on top of any stationery project, adding immediate character and charm.” – Avid Stationery Enthusiast
Here are some tips for using stamps and stickers:
- Mix and Match: Combining stickers with stamps can create layered effects that are visually appealing.
- Coordinate Colors: Keeping a consistent color palette helps maintain harmony in your design.
- Personalize Themes: Tailor your sticker choices to the theme of your stationery, be it vintage, modern, or whimsical.
| Material | Cost | Durability | Design Versatility |
|---|---|---|---|
| Rubber for Stamps | Moderate | High | High |
| Pre-made Stickers | Varies | Moderate | High |
Upcycling Materials for Eco-Friendly Stationary
Using upcycled materials is a great way to make unique, eco-friendly stationery. It lets you create beautiful items while helping the environment. Let’s explore some ways to upcycle materials for your stationery.
Recycled Paper
Recycled paper is key for eco-friendly stationery. You can find it at local recycling centers or reuse old paper at home. It adds texture and character to your projects.
- Sourcing: Look for local recycling centers or stores that specialize in recycled paper products.
- Preparing: Clean and flatten the paper to prepare it for crafting.
- Crafting: Use your recycled paper to create envelopes, letterheads, and more.
Natural Dyes and Inks
Adding natural dyes and inks to your stationery is another sustainable step. You can make natural dyes from plants and fruits. Eco-friendly inks come from organic and non-toxic materials.
- Creating Dyes: Use ingredients like beetroot, turmeric, and spinach to create vibrant, natural dyes.
- Applying Inks: Choose inks that are free from harmful chemicals and are made from natural sources.
- Experimenting: Combine different natural elements to discover new, eco-friendly colors for your stationery.
In summary, sustainable stationery crafting is all about using recycled paper and natural dyes. It makes your stationery beautiful and eco-friendly. These methods not only improve your stationery but also support a greener process.
Incorporating Watercolor Art
Adding watercolor to your DIY stationery can make simple cards and letters into stunning art. It’s easy to mix watercolor with calligraphy and stamping for amazing results.
Watercolor Techniques
Watercolor stationery design begins with basic artistic painting methods. Wet-on-wet techniques create soft, blended colors. Dry brush methods add texture and boldness to your designs.
- Wet-on-wet effect: Creates soft, flowing color transitions.
- Dry brushing: Adds texture and intensity.
- Layering: Builds depth and complexity in your artwork.
Combining with Other Stationary Elements
Combining watercolor with calligraphy and stamps is exciting. A watercolor background can be a beautiful base for calligraphy. This adds a personal touch to your letters or invitations.
| Technique | Recommended Application |
|---|---|
| Watercolor Background | Use as a base layer for calligraphy |
| Stamped Design | Accent over a dried watercolor wash |
| Layered Watercolor | Enhance with metallic ink pen details |
Using these creative methods makes your DIY projects unique and personal. Try different watercolor stationery designs to find what suits you best!
The Benefits of Digital DIY Stationary
As a designer who loves personalization, I’ve found digital stationery designs incredibly beneficial. The ease of making multiple copies is unmatched. Once I create a design, I can print many copies easily using print-at-home stationery.
Sharing online is a big plus. Sending personalized cards or invitations is a breeze. With online stationery customization, I can share my work with friends and family via email or social media. This digital method makes sharing easy and adds a modern twist to traditional stationery.
Another great benefit is the wide range of design tools available. Platforms like Canva and Adobe Spark offer templates for all skill levels. These tools make it easy to create unique, personalized stationery that shows off my style.
Lastly, printing digital stationery at home is simple. With a good printer and quality paper, my designs come to life quickly. This saves time and money compared to professional printing services. The flexibility and control over the final product make print-at-home stationery a great option.
In summary, digital DIY stationery offers many benefits. These include easy replication, online sharing, and access to design tools. By using these advantages, I can create stationery that is meaningful and reflects my creative vision.
| Aspect | Benefits |
|---|---|
| Ease of Replication | Quick and effortless creation of multiple copies. |
| Convenience of Sharing | Easily share designs online via email or social media. |
| Access to Design Tools | Wide range of templates and customization options. |
| Print-at-Home | Save time and money with home printing. |
Tips for Storing and Organizing Your DIY Stationary
Keeping your DIY stationery organized is crucial. Whether you’re new or experienced, these tips will help you manage your space. You’ll avoid clutter and work more efficiently.
Storage Solutions
Choosing the right storage for your supplies is key. Use clear bins or drawers to see what you have. Adjustable shelving and pegboards keep tools handy.
- Bins and drawers
- Adjustable shelving units
- Pegboards for tools
Invest in quality storage to protect your supplies. This is important for archival tips for stationery. Labeling containers helps you find things quickly.
Keeping Materials Organized
Keeping your space tidy boosts your productivity. Sort materials by type and color. Use small containers for small items.
Use stationery organization hacks like storage boxes and hanging organizers. They keep tools within reach. This makes crafting more fun and efficient.
Cataloging Your Creations
Tracking your projects is a great way to keep your creativity. Make a catalog of your designs. Include materials, techniques, and unique features.
- Digital or physical catalogs
- Detailed logs of materials and techniques
- Photos of finished projects for inspiration
This method is not just for organization. It’s also an archive. It lets you revisit and get inspired by your past work. Remember, archiving is a key part of archival tips for stationery.
By following these tips, organizing your supplies becomes a part of the crafting process. It saves you time and effort.
Conclusion
As we finish our journey through DIY stationery, I feel a deep sense of joy. Making your own stationery lets you show off your creativity and uniqueness. Every piece is a special way to share who you are.
We’ve looked at many ways to make stationery, like designing letterheads and making custom envelopes. Each step brings happiness and a sense of accomplishment.
Looking back, we’ve seen that making paper art is endless. You can add calligraphy, use stamps and stickers, or even reuse materials. These ideas make your stationery more beautiful and personal.
Handmade stationery is more than just a hobby. It’s a way to connect with others in a special way. It offers a touch that digital messages can’t match.
I hope you keep trying new things and exploring different materials and methods. Let your stationery tell the world who you are. It will help you make connections that are as deep as the stationery itself.
FAQ
What are some easy DIY stationery ideas for beginners?
Start with simple projects like custom letterheads and handmade envelopes. Use basic tools like scissors, rulers, and patterned paper. Adding calligraphy and stickers can make your creations unique without being hard to learn.
What materials do I need to get started with DIY stationery?
You’ll need cardstock, specialty papers, and envelopes. Basic tools include cutting mats, scissors, rulers, and adhesives. Optional extras like washi tape, stamps, and embossing powders can add flair.
How do I create custom envelopes?
Choose the right paper for weight and texture. Use envelope templates and precise cutting tools. Decorate with liners, stamps, and artwork for a professional look.
What are the best tips for designing personalized letterhead?
Pick fonts and layouts that match your brand. Add graphics, monograms, or logos in a balanced way. Use high-quality paper and professional printing for the best results.
What tools do I need for adding calligraphy to my stationery?
You’ll need nibs, brushes, and ink for calligraphy. Start with beginner-friendly kits. Practice to improve your strokes and letters for elegant stationery.
How can I use watercolor techniques in my DIY stationery?
Learn basic watercolor techniques like washes and blending. Mix these with calligraphy and stamping for stunning designs. Watercolor adds a vibrant touch to your projects.
What are some eco-friendly options for creating DIY stationery?
Use recycled paper and repurposed materials for eco-friendly stationery. Make your own natural dyes and inks to reduce environmental impact while achieving beautiful designs.
How can I make DIY stationery for special occasions like weddings?
Create personalized save-the-date cards, invitations, and thank you cards for weddings. Use high-quality paper and embellishments like ribbons and die-cuts. Ensure each piece matches your wedding’s theme and tone.
What are the benefits of digital DIY stationery?
Digital DIY stationery is easy to replicate and share. You can find design tools online and print at home. It’s a modern way to make personalized stationery without needing lots of supplies.
How should I store and organize my DIY stationery?
Use boxes and drawers for storage and organization. Keep your crafting space tidy for easy access. Consider cataloging your creations to track designs and inspire future projects.