Skip to content
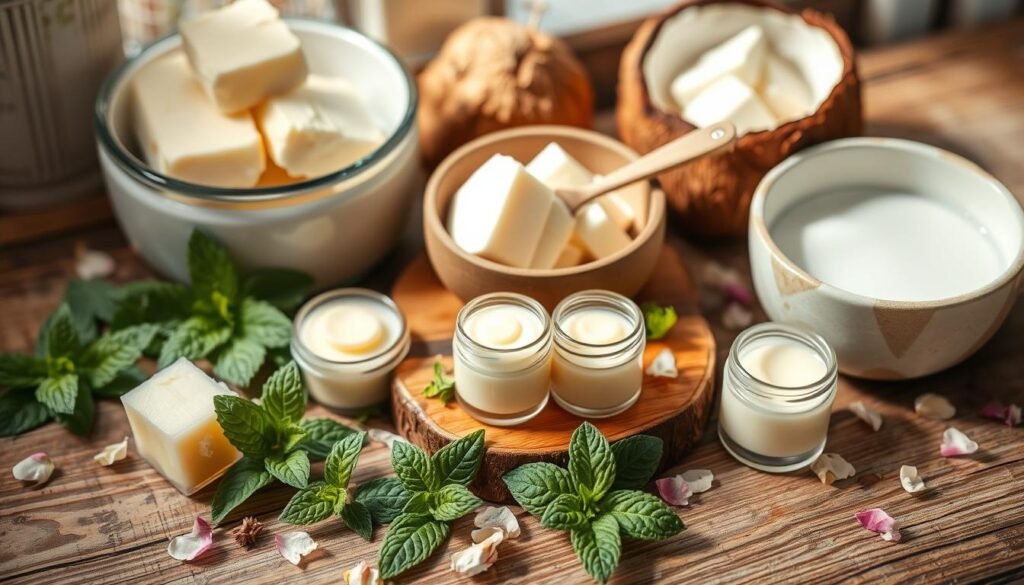
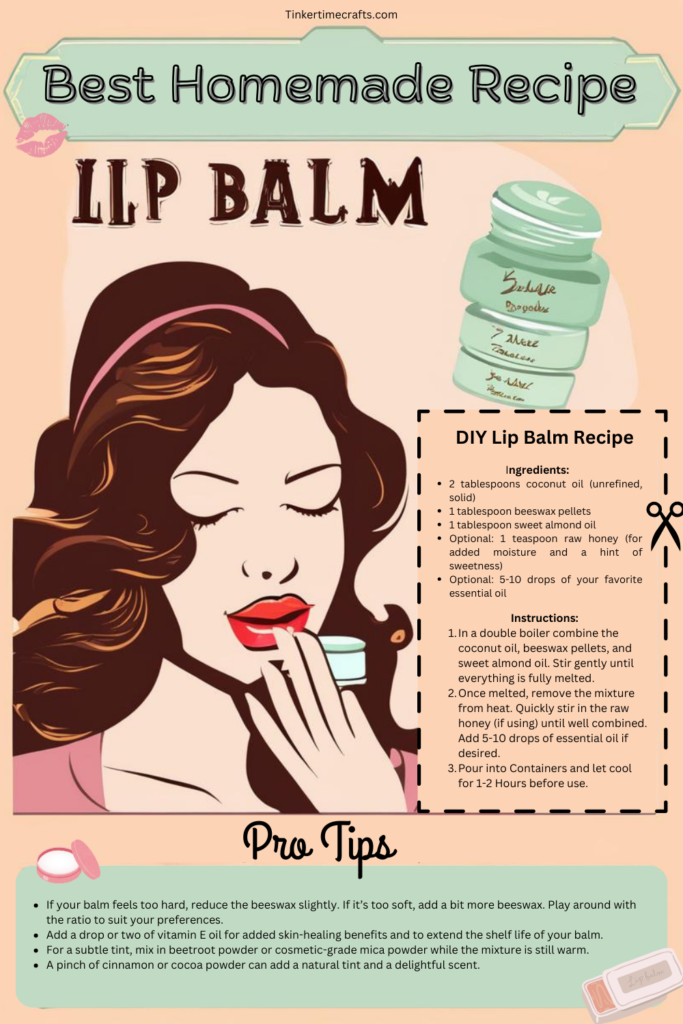
Easy Homemade DIY Lip Balm: Natural & Nourishing
This easy DIY lip balm recipe needs only four ingredients. It’s a lip care game-changer and takes just a few minutes to make.
Once you try this nourishing mix, you’ll ditch store-bought balms for good. Let’s dive into making some delicious lip balm!
Understanding the Benefits of Natural Lip Care
Commercial lip care products often don’t give our lips the nourishment they need. They’re filled with synthetic ingredients like soy and canola oil. Many commercial lip balms have harsh chemicals and additives. These can strip away your lips’ natural oils. This leads to a cycle of needing to reapply and can cause allergic reactions in sensitive skin. So as you see, the everyday chap stick is actually doing the opposite of what it’s suppose to be doing. So if you have tried everything out there to help your chapped lips and still have the problem, it’s not you! It’s what you are using.
Advantages of Homemade Solutions
When you make your own lip balm, you control what goes into it. This means your lips get the care they deserve. Homemade balms are also cheaper and you can have fun customizing them to your liking.
Essential Ingredients for DIY Lip Balm
Creating your own lip balm at home is exciting. A few key ingredients make it all possible. Let’s explore the ingredients that will make your lips soft and nourished.
Natural ingredients like coconut oil, beeswax, and essential oils are great for your lips.
Coconut oil (unrefined) fights off bacteria, is a superstar in lip balm. It deeply hydrates the skin and offers mild SPF. This protects your lips from the sun.
Beeswax helps to lock in the moisture. Together, they make your lips soft and healthy.
Sweet almond oil adds a creamy texture that your lips will love. It’s full of fatty acids and vitamins A and E. It makes dry, chapped lips soft and supple.
- Coconut oil (unrefined, solid)
- Beeswax pellets
- Sweet almond oil
- Optional: Raw honey
- Essential Oils (Optional)
Raw honey is an optional but great addition. It deeply nourishes and soothes your lips. With these ingredients, you can make a lip balm that’s both effective and luxurious.
Essential oils are the final touch. They add a wonderful scent and extra skin benefits. You can choose from calming lavender to energizing citrus, making your homemade lip balm truly yours.
| Ingredient | Benefits |
|---|---|
| Coconut Oil | Deeply moisturizing, antibacterial, and nourishing |
| Beeswax | Forms a protective barrier to lock in hydration |
| Sweet Almond Oil | Creamy texture that’s easily absorbed by the lips |
| Raw Honey | Natural humectant that deeply nourishes and soothes |
| Essential Oils | Provide natural fragrance and additional skin benefits |
Using Alternative Carrier Oils for DIY Lip balm
Alternative Carrier Oils
Want to try something new? Swap coconut and sweet almond oils for olive, avocado, or jojoba oil. Each oil has its own benefits, like antioxidants and skin soothing. Mixing different oils can create the perfect lip balm for you.
Wax Options: Beeswax vs. Vegan Alternatives
Choosing the right wax is key to making the best lip balm. Beeswax is a top choice, offering a protective layer and keeping moisture in. But, vegans have plant-based options that work just as well.
Carnauba wax comes from the “Tree of Life” palm in Brazil. It’s harder than beeswax, so you use less of it. It melts at 84°C, making yourlip balm firmer and more durable.
Candelilla wax is another vegan choice, from the Candelilla plant in Mexico and the US. It melts at 70°C, similar to beeswax. It’s plant-based and gives a rich, creamy lip balm feel.
Beeswax or vegan alternatives, the wax you pick shapes your lip balm‘s feel and function. Try different waxes to find the perfect one for you.
Butter-Based Ingredients for Extra Moisture
Adding butter to your lip balm recipe is pure magic. Butters like shea, cocoa, and mango are amazing for moisturizing your lips. They not only smell great but also protect your lips from dryness.
Shea Butter Properties
Shea butter comes from the African shea tree nuts. It’s a moisture magnet with soothing and anti-inflammatory properties. It also boosts collagen for softer lips and protects against the sun.
Cocoa Butter Benefits
Cocoa butter is a superstar for your lip balm. It adds a creamy texture and deeply hydrates your lips. Plus, it smells like chocolate, making it a treat to use.
Mango Butter Applications
Mango butter is full of vitamins and antioxidants for dry lips. It melts well into lip balm, giving long-lasting hydration and a soft finish.
When making your lip balm, try different butter mixes for the best moisture. Start with a little and adjust as needed. You’ll get the softest lips ever!
Step-by-Step DIY Lip Balm Tutorial
Now that we have gone over everything you need to make lip balm at home, it’s time for the fun.
- Melt the beeswax and coconut oil in a double boiler. Stir until it’s smooth.
- Remove it from the head and add essential oils (optional ) Work fast as it will harden quickly once removed from the heat.
- Pour the mixture into lip balm tubes or tins. Use a syringe to avoid spills.
- Let the set at room temperature for 5 minutes.
- Chill them in the fridge for about an hour.
Enjoy your silky-smooth, nourishing DIY lip balm!
This recipe makes 10 lip balm tubes. You can keep some and give others as gifts. Enjoy the natural goodness of your DIY lip balm!
| Ingredient | Quantity |
|---|---|
| Beeswax Pellets | 12 grams |
| Coconut Oil | 6 grams |
| Peppermint Essential Oil | 3 drops |
| Lemon Essential Oil | 5 drops |
Essential Oil Combinations for Natural Flavoring
Ready to make your lip balm more exciting with essential oils? But first, let’s talk about safety. Not all oils are safe for your lips. Stick to oils like peppermint, lavender, sweet orange, or eucalyptus. They add flavor and are good for your lips.
Want to mix things up? Try peppermint and vanilla for a sweet, minty taste. Or mix sweet orange and tangerine for a tropical flavor. Just use about 20 drops per batch. Avoid oils like cinnamon or clove to avoid burning your lips.
Safe Essential Oils for Lips
- Peppermint
- Lavender
- Sweet Orange
- Eucalyptus
Recommended Blends
- Peppermint and Vanilla
- Sweet Orange and Tangerine
- Lavender and Chamomile
- Lemon and Spearmint
Remember, a little essential oil is enough. Start small and adjust to taste. Enjoy the natural flavors and benefits in your lip balm recipe, natural lip balm, and homemade lip balm!
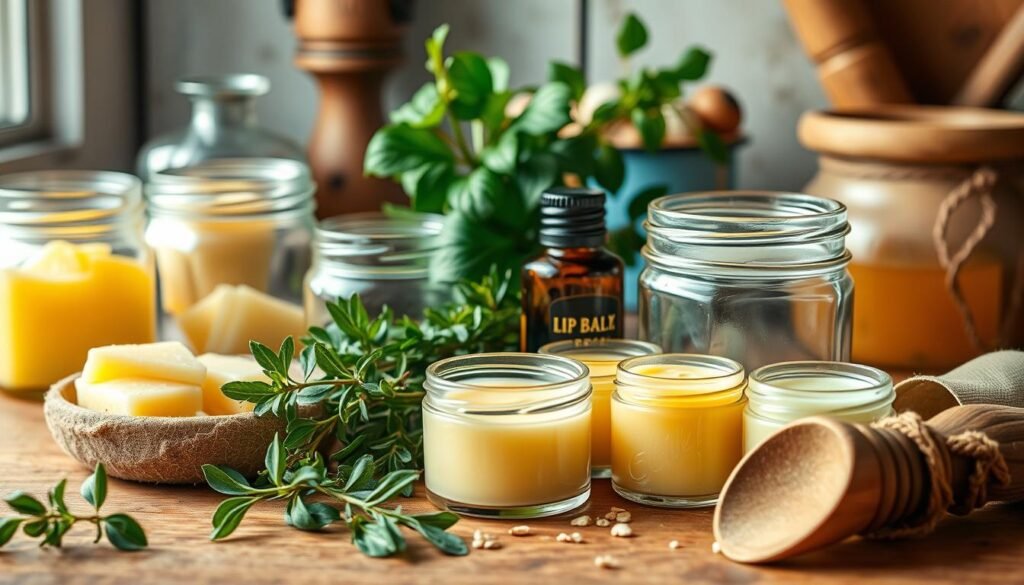
Storage and Packaging Solutions
There are many ways to store and package your homemade lip balm. Classic plastic tubes are great for quick use. But, if you want something special, try cute tins or jars. Just make sure whatever you decide to use is clean and dry. Storing your lip balm correctly will make it last up to 2 years.
Lip Balm Containers and Packaging:
- Plastic lip balm tubes are convenient for carrying in your purse or pocket.
- Tins and jars, like mini jam jars, add a charming, boutique-style touch.
- Push-up cardboard tubes offer an eco-friendly, recyclable option.
- 15 mL glass pots provide a sleek, reusable container for your homemade balm.
Troubleshooting Common Issues
Making homemade lip balm can be fun, but it comes with its own set of problems. Don’t worry, I’ve got some tips to help you fix common issues. With these, you’ll become a pro at making DIY lip balm.
Texture Problems
If your lip balm feels gritty, it’s probably because of the shea butter. To solve this, heat the mixture to 175°F for about 20 minutes before adding the shea butter. This method prevents crystals and gives you a smooth texture.
Consistency Concerns
Having trouble with lip balm that’s too hard or too soft? It’s easy to fix. Just adjust the ratio of base oils to beeswax. More oil makes it softer, while more beeswax makes it firmer. Find the right mix for your perfect lip balm.
Shelf Life Management
Keeping homemade lip balm fresh can be tough, thanks to ingredients like honey. To keep it fresh longer, add a bit of vitamin E oil (about 0.5% of the recipe) or use less honey. Also, proper storage and packaging help a lot.
Remember, making lip balm is both science and art. Embrace the learning process, and you’ll soon be making nourishing lip balms. Your friends and family will love them!
Customization Tips and Variations
Get creative and customize your lip balm recipe! Want it to shine more? Try using castor oil instead of coconut oil. Looking for a new scent? Mix different essential oils, but remember to stay safe and do research on the oils you want to add.
Want to add some color? Use beetroot powder or cocoa powder. The possibilities are endless!
Why not make a variety of flavors? It’s like having your own homemade lip balm buffet. Just make sure to label them so you don’t mix them up. Try different oils, butters, and colors to make your own special DIY lip balm.
Making your own lip balm lets you tailor it just right. Have fun tweaking the recipe and see what amazing flavors you can invent. Your lips and whoever you decide to share your lip balms with will love the extra care you give them!