Skip to content
 How to Make DIY Beeswax Wraps
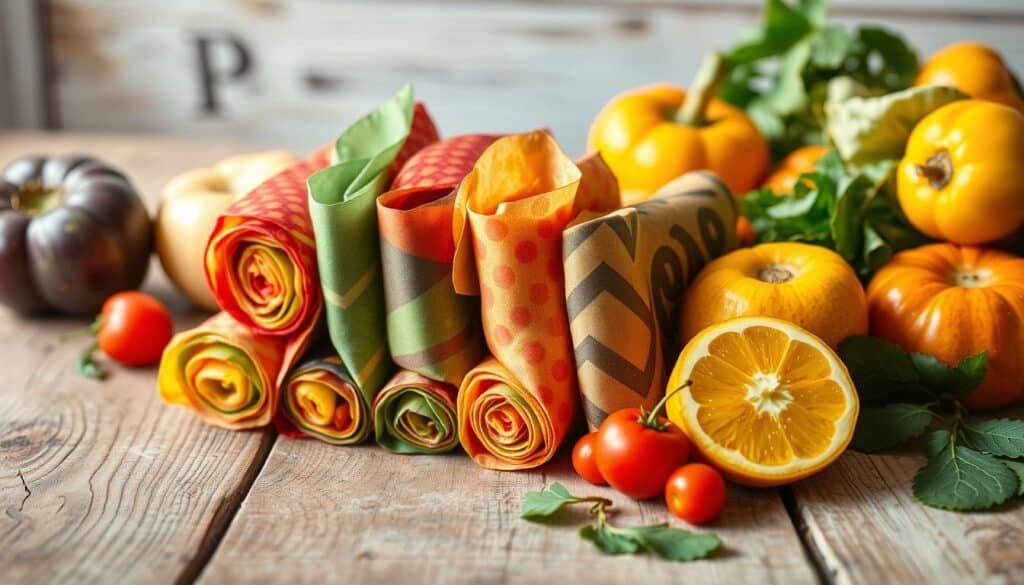
Hey there! Are you ready to switch to beeswax wraps diy and say goodbye to plastic wrap? I’m excited to share my journey with you! After 3 weeks of trial and error, I found the perfect recipe for homemade beeswax wraps. It’s amazing how something simple can help reduce plastic waste in our kitchens.
I tried different sizes, from large squares to medium squares, and even a circle for a big bowl. Finding the right ingredients for my diy reusable food wraps was a game-changer. I tested various mixes, including beeswax only, beeswax and jojoba oil, and more. But the best mix was sustainably sourced pine resin, beeswax pastilles, and organic jojoba oil.
Now, you might wonder… “Is making beeswax wraps diy really that easy?” And my answer is, yes! It takes less than 10 minutes to make a wrap. With the right materials, you can create your own homemade beeswax wraps that last up to a year. So, are you ready to start making the switch to diy reusable food wraps?
Understanding Beeswax Wraps and Their Environmental Impact
Thinking about switching to eco-friendly beeswax wraps? You might wonder what they are and how they help in the kitchen. Beeswax wraps are a natural, reusable option instead of plastic wrap. They can cover bowls, wrap snacks, and even store food in the fridge. Switching to beeswax wraps cuts down on plastic waste and saves money over time.
Beeswax wraps have big environmental benefits. Every year, over 300 million tons of plastics are made, with half being single-use. Beeswax wraps are a reusable, washable, and biodegradable choice. They can last up to a year with care, reducing the need for single-use plastics.
What Are Beeswax Wraps?
Beeswax wraps mix beeswax, jojoba oil, and tree resin, all natural and safe. They come in various sizes for different uses. You can use them to wrap fresh flowers, portion snacks, or decorate fridge shelves.
Environmental Benefits of Switching from Plastic
Switching to beeswax wraps helps the environment a lot. Plastic takes hundreds of years to break down, but beeswax wraps decompose in months. Plus, they’re compostable, so they can go into your compost bin when they’re done.
Cost Savings Over Time
Beeswax wraps might cost more upfront than plastic wrap. But, they can last up to a year with care. This means less need for single-use plastics and more savings over time. You can even make your own beeswax wraps with a simple recipe and basic materials.
By following a sustainable kitchen wraps tutorial, you can make your own beeswax wraps. They’re made from natural ingredients, are reusable, and biodegradable. Beeswax wraps are a great alternative to traditional plastic wrap.
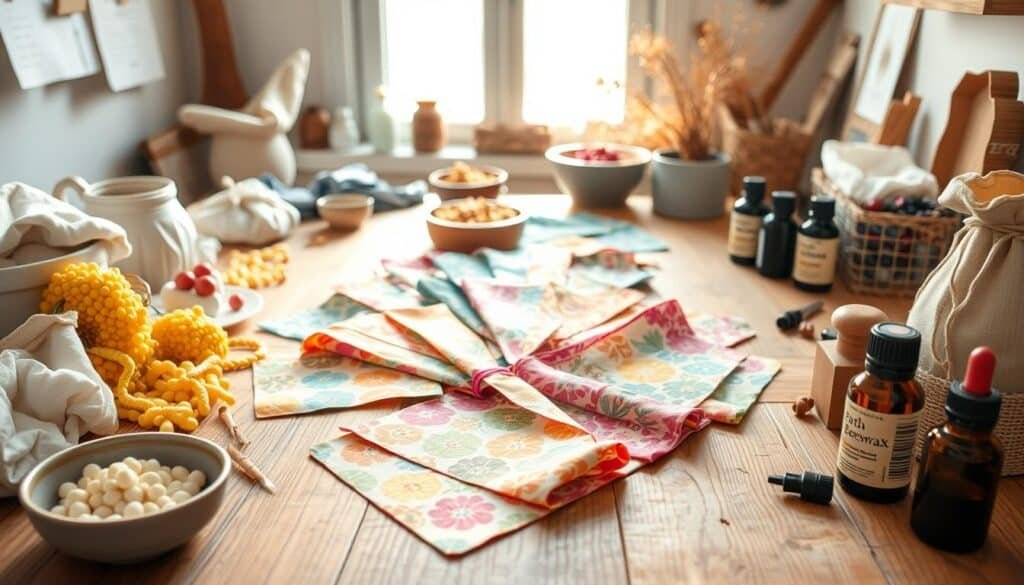
Essential Materials for Making Beeswax Wraps DIY
To start making your own handmade beeswax wraps, you’ll need a few basic things. You’ll need beeswax, jojoba oil, and cotton fabric. Also, you’ll need a double boiler and a brush. We’ll guide you through the beeswax wrap crafting guide step by step.
Here’s a list of materials you’ll need:
- Beeswax
- Jojoba oil
- Cotton fabric
- Double boiler
- Brush
When picking your fabric, think about the size and design you want. You can choose from many designs like sugar skulls or rainbow sloths. For a standard wrap, you’ll need about 60cm of fabric. Cut it into six 30cm squares for wrapping food like sandwiches or covering bowls.
With the right materials and a bit of patience, you can make your own beeswax wrap crafting guide. This DIY project is fun and eco-friendly. It helps reduce plastic wrap use and supports a sustainable lifestyle.
Choosing the Right Fabric for Your Wraps
Choosing the right fabric for your diy reusable food wraps is key. You need something breathable, durable, and easy to work with. Cotton is a top pick for eco-friendly beeswax wraps. Look for high-quality cotton with a weight of 110-150 gsm.
This weight ensures your wraps are strong and can be used many times. Cotton Poplin and quilting cotton are great options. They come in various weights and patterns, making it easy to find the right one.
- Wash and dry your fabric before use to remove any impurities
- Iron your fabric to remove any wrinkles
- Cut your fabric into the desired size and shape
By following these tips and choosing the right fabric, you can make your own eco-friendly beeswax wraps. They’re perfect for storing food and reducing waste.
| Fabric Type | Weight (gsm) | Pattern |
|---|---|---|
| Cotton Poplin | 120 | Plain |
| Quilting Cotton | 110-150 | Various |
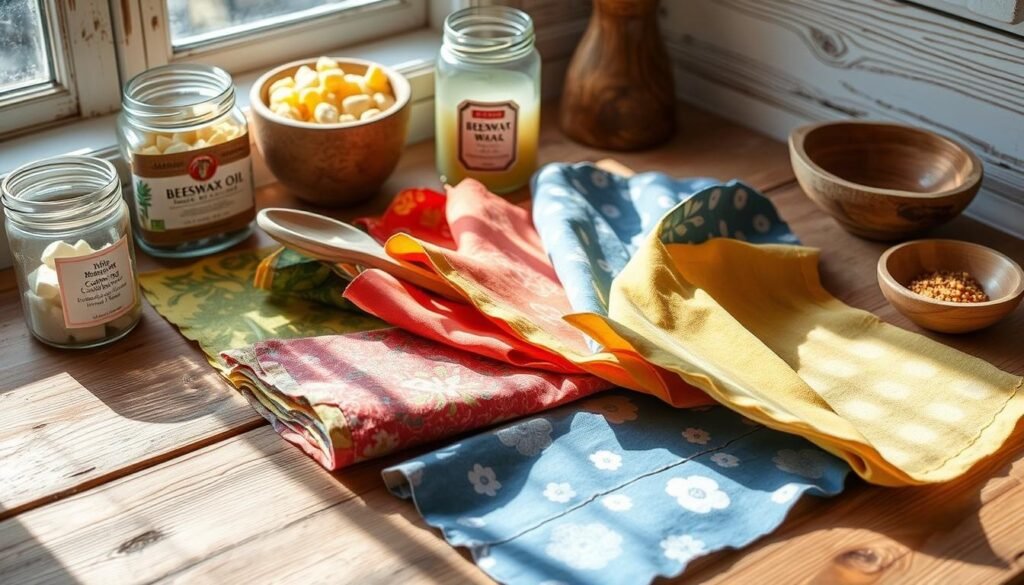
Creating Your Beeswax Mixture
To make your own homemade beeswax wraps, you need to mix ingredients. This is where the magic happens. You mix organic beeswax pellets, food-grade pine resin, and organic jojoba oil to create a smooth wax. This wax will coat your fabric.
The mix needs 1 cup of organic beeswax pellets and 2 tablespoons of organic jojoba oil. You also add 6 tablespoons of food-grade pine resin. Heat them until the pine resin and beeswax melt and mix well.
Here are the steps to create your beeswax mixture:
- Preheat your oven to 225°F
- Mix together the beeswax pellets, pine resin, and jojoba oil in a bowl
- Heat the mixture in the oven for 30-40 minutes, or until the pine resin and beeswax have fully melted and combined
After making your beeswax mixture, you can make your own diy beeswax cloth wraps. Brush the mixture on your fabric and let it dry. With care, your wraps can last up to a year or more.
Step-by-Step Process to Make Beeswax Wraps
Now that you have all the necessary materials, it’s time to start making your own diy beeswax wraps. This process is fun and easy. With a few simple steps, you’ll have your own handmade beeswax wraps in no time.
Setting Up Your Workspace
To get started, set up your workspace. Cover your work surface with parchment paper or a silicone mat. Have all your materials within reach. You’ll need scissors, beeswax pastilles, a paint brush, and your pre-cut fabric pieces.
Melting and Application Techniques
Next, melt the beeswax. Place the beeswax pastilles in a double boiler or a melting pot. Heat it until it’s completely melted. Once melted, add jojoba oil or pine resin to enhance the pliability and stickiness of your wraps.
Now, apply the wax mixture to your fabric. Use a paint brush to evenly coat both sides of the fabric. Make sure to cover the entire surface. You can use a
Drying and Setting Methods
After applying the wax mixture, let it dry and set. Hang the wraps up to dry, or place them in a low-temperature oven (150°F – 200°F) for a few minutes. Once dry and set, they’re ready to use. Use them to cover bowls, wrap snacks, or store food in the fridge.
Here are some tips to keep in mind when making your own diy beeswax wraps:
- Use 100% cotton, hemp, or linen fabric for the best results.
- Add jojoba oil or pine resin to the wax mixture for extra pliability and stickiness.
- Use a low-temperature oven to dry and set the wraps.
- Wash the wraps with cold to lukewarm water and mild soap.
| Material | Quantity |
|---|---|
| Beeswax pastilles | 1 cup |
| Jojoba oil | 1/4 cup |
| Pine resin | 1 tablespoon |
| Cotton fabric | 1 yard |
Common Mistakes to Avoid When Making Beeswax Wraps
When making beeswax wraps diy, it’s key to steer clear of common mistakes. Using too much wax can make wraps stiff and hard to use. Too little wax, on the other hand, can mean they don’t keep food fresh well.
Another error is not prepping the fabric right. Eco-friendly beeswax wraps need 100% cotton fabric for best results. Wrong fabric or not washing it first can make wraps less durable and less effective.
Here are more mistakes to dodge when making beeswax wraps diy:
- Not using filtered beeswax, which can result in wraps with impurities and residue
- Not cutting the wraps correctly, which can lead to fraying and uneven edges
- Not drying the wraps properly, which can affect their texture and effectiveness
To make eco-friendly beeswax wraps that work well, avoid these mistakes. Always use top-notch materials and follow the right steps for the best outcome.
Proper Care and Maintenance of Your Wraps
Now that you’ve made your own diy beeswax cloth wraps, it’s key to know how to care for them. This way, they’ll last longer. With the right care, your wraps can help you save money and reduce waste.
To keep your wraps in top shape, don’t use hot water. It can make the wax melt and cause damage. Instead, use cool water and a gentle detergent for cleaning. Also, never microwave your wraps, as the heat can melt the wax.
Here are some tips for caring for your wraps:
- Let hot dishes cool before covering them with your wraps.
- Avoid using harsh detergents or heat, which can damage the wraps.
- Store your wraps in a visible spot, like a basket or bowl on the counter, to encourage more frequent use.
By following these simple care and maintenance tips, you can enjoy your diy beeswax cloth wraps for a long time. They’ll be a valuable part of your sustainable kitchen wraps tutorial. Remember, with a little care, your wraps can help you live a more sustainable lifestyle.
Creative Ways to Use Your Homemade Beeswax Wraps
Now that you’ve made your own beeswax wraps, it’s time to explore their uses. They can be used for food storage, covering bowls, and even as a gift wrap. This makes them a great, eco-friendly choice instead of regular wrapping paper.
Handmade beeswax wraps are very versatile. They’re great for storing cheese, herbs, and fruits to keep them fresh. You can also use them to wrap sandwiches, snacks, and leftovers. Plus, they can be turned into reusable snack bags for lunches or daily use.
- Wrapping gifts for a sustainable and eco-friendly alternative to traditional wrapping paper
- Covering plants to protect them from frost or pests
- Using them as a placemat or table runner for a rustic and charming touch
- Creating a reusable bag for carrying small items, such as makeup or toiletries
By making your own beeswax wraps, you can cut down on single-use plastics. This helps you live more sustainably. So, get creative and find new uses for your handmade beeswax wraps!
Troubleshooting Tips for Perfect Results
Creating your own diy reusable food wraps can sometimes come with challenges. But don’t worry, I’ve got some tips to help you out. Let’s talk about how to fix common issues so your eco-friendly beeswax wraps turn out just right.
One common problem is uneven wax distribution. To fix this, just re-melt the wax and apply it again. If your wrap feels sticky, try placing it between two parchment papers. Then, use a warm iron to even out the wax.
Here are some more tips to keep in mind:
- Regularly clean your wraps with cool water and mild soap. This prevents bacteria and other substances from building up.
- Don’t use hot water to clean your wraps. It can melt the beeswax and make it lose its stickiness.
- Keep your wraps in a cool, dry place. Avoid direct sunlight or heat sources to keep them in good condition.
By following these tips, you’ll be able to make beautiful, functional diy reusable food wraps. They’ll make your kitchen more sustainable and eco-friendly. And with a bit of practice and patience, you’ll soon be a pro at making your own eco-friendly beeswax wraps!
Making Your Kitchen More Sustainable with Beeswax Wraps
Switching to diy beeswax cloth wraps is a big step towards a greener kitchen. These wraps are great because they naturally fight off bacteria and fungi. This helps keep your food fresh and safe from harmful germs.
Starting your own beeswax wraps is easy with a tutorial. You can use cotton, hemp, or linen fabric. Add beeswax, and maybe some pine resin and jojoba oil for extra benefits.
There are more ways to make your kitchen eco-friendly. For example:
- Use reusable bags for shopping
- Choose energy-saving appliances
- Go for glass or stainless steel for storing food
Small changes can add up. By using beeswax wraps and other green products, you help the planet. You also make your kitchen more sustainable.
Every little bit helps, and making your own wraps is a great start. With a bit of effort, you can ditch plastic wrap and ziplock bags. Start your journey to a greener kitchen today.
| Eco-Friendly Kitchen Swaps | Benefits |
|---|---|
| Using reusable bags | Reduces plastic waste |
| Switching to energy-efficient appliances | Saves energy and reduces carbon footprint |
| Choosing sustainable food storage options | Reduces plastic waste and keeps food fresh |
Conclusion: Embracing a Zero-Waste Kitchen Journey
As you finish this guide, remember starting with beeswax wraps is just the beginning. You can turn your kitchen into a green space with a bit of creativity. Think about using reusable bags, eco-friendly cleaners, and composting food waste too.
Every small change you make can make a big difference. Using handmade beeswax wraps saves money and helps the planet. Add reusable utensils, cloth towels, and buying in bulk to your routine. This way, you’ll create a kitchen that reflects your values.
Start small and celebrate your wins. With determination and DIY skills, you can make your kitchen eco-friendly. Happy crafting, and here’s to your zero-waste journey!