 Skip to content
 How to Make Your own Wrapping Paper – DIY Gift Wrap
Hey there, crafty friends! 🎨 Ready to dive into the world of DIY gift wrap? I’ve got some awesome ideas to share that’ll make your presents pop! Making your own wrapping paper is not only fun but also adds that special touch to any gift.
We’ll explore everything from using butcher paper and tempera paints to creating unique patterns with stamps and glitter. Trust me, once you start, you’ll be hooked on this creative way to wrap gifts!
This post may contain affiliate links. For more information please read my disclousure page.
In this guide, I’ll walk you through the essential materials and supplies. I’ll share step-by-step instructions and showcase a variety of techniques to help you unleash your inner artist. Whether you’re looking to save money or simply express your personal style, homemade gift wrap is the way to go. Let’s get started on your very own DIY wrapping paper that will have your friends and family raving about your creativity!
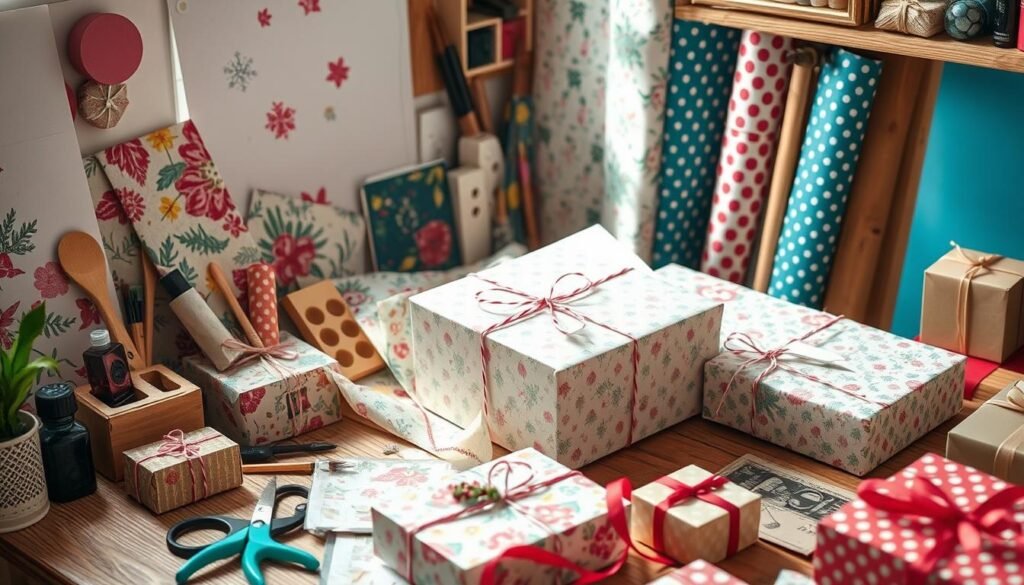
Essential Materials and Supplies for DIY Gift Wrap
Start your creative journey by making your own personalized wrapping paper. The right materials and supplies are crucial for stunning custom gift wrap. Let’s explore the essentials for your DIY project.
Basic Paper Options
You have many paper choices for your project. Think about using butcher paper (in brown or white), kraft paper, or recycled paper bags. These options offer a clean base for your designs.
Decorative Tools and Materials
Now, it’s time for fun with decorative tools and materials. Try tempera paints, stamps, ink pads, and liquid watercolors to add unique patterns and textures. These supplies will help you express your creativity and bring your custom wrapping paper ideas to life.
Optional Embellishments
- Glitter – Add a touch of sparkle and shine to your paper crafts.
- Ribbons – Elevate your wrapping with coordinating ribbons and bows.
- Wooden shapes – Incorporate natural elements for a rustic, handmade look.
Remember, the most important thing is to have fun and let your creativity shine! Keep an eye out for sales at craft stores like Michaels for great deals on stamps, paints, and other decorative items.
Benefits of Creating Your Own Custom Gift Wrap
Gift giving is not just about the present. It’s also about how you present it. Making your own custom gift wrap is a smart move. It’s affordable and lets you add a personal touch that store-bought wraps can’t.
Custom wrapping lets you show off your creativity. You can use personal photos or inside jokes. This makes the gift even more special and memorable.
DIY wrapping is also a fun activity. You can do it with kids or friends. It’s a great way to spend time together and create something unique.
Homemade wraps are also good for the planet and your wallet. You can use old newspapers or fabric scraps. This reduces waste and lets you express your creativity.
Creating your own gift wrap is more than saving money. It’s a way to add a personal touch and show off your creativity. So, next time you need to wrap a gift, try making your own custom wrapping paper.
How to Make Your own Wrapping Paper: Step-by-Step Guide
Ready to unleash your creativity and craft your own unique diy wrapping paper or homemade gift wrap? Let’s dive in! First, prep your workspace by laying down a drop cloth or protective surface. This will make cleanup a breeze.
Preparing Your Workspace
Start by gathering your supplies. You’ll need a variety of papers, like craft paper, recycled newsprint, or even old maps and magazines. Don’t forget the decorative elements – paints, stamps, ribbons, and more. Having everything within reach will streamline the process.
Basic Wrapping Techniques
For a simple yet striking look, try the scrape painting technique. Dab paint onto your paper, then use a gift card or other straight edge to create fun, textured designs. Prefer a more organic aesthetic? Splatter paint with liquid watercolors for a one-of-a-kind pattern. When wrapping your gifts, a hot glue gun can be a lifesaver for achieving crisp, clean edges.
Adding Personal Touches
Now for the fun part – personalizing your diy wrapping paper! Stamp your own designs using carved blocks or stencils. Let your inner artist shine by hand-drawing intricate patterns or whimsical illustrations. Don’t be afraid to experiment with sparkly embellishments, like glitter or sequins, for an extra touch of magic. Remember, the beauty of homemade gift wrap is in the imperfections – they add charm and character!
With a little creativity and these simple techniques, you’ll be well on your way to crafting swoon-worthy, one-of-a-kind wrapping paper for all your gift-giving needs. Let’s get wrapping!
Creative Stamping Techniques for Unique Patterns
Unleash your artistic flair and create custom wrapping paper that truly stands out! Stamping is a game-changer for adding unique patterns and personal touches to your gift wrap. With a little creativity and some basic supplies, you can transform ordinary paper into one-of-a-kind masterpieces.
Start by exploring the endless possibilities of stamps. Whether you opt for pre-made designs or carve your own custom stamps using craft foam, the options are endless. Mix and match different stamp shapes, sizes, and motifs to layer and overlap for captivating patterns. Experiment with various ink colors, too – from bold and vibrant to soft and subtle hues, the possibilities are endless.
For a cohesive theme, try coordinating your stamp selections with the occasion or recipient. Nautical-inspired anchors, sailboats, and sea creatures could be perfect for a beach lover, while whimsical florals or geometric shapes might suit a modern minimalist. The key is to have fun and let your creativity shine!
If you’re feeling adventurous, why not create your own custom stamps? Carving simple shapes or patterns into craft foam or linoleum blocks is a rewarding process that allows you to truly personalize your paper crafts. Start with a simple sketch, then carefully carve away the negative space to reveal your design. Test it out on scrap paper before using it on your final wrap.
Remember, the beauty of stamping is in the exploration. Experiment with different techniques, like overlapping stamps or using multiple ink colors. You might be surprised by the unique patterns that emerge. With a little practice, you’ll be crafting custom wrapping paper that’s sure to delight your gift recipients.
Paint and Splatter Methods for Artistic Gift Wrap
Unleash your creativity and make unique diy wrapping paper with paint and splatter. It’s time to get a little messy for the best results. We’ll show you two easy methods to make your creative gift presentation stand out.
Scrape Painting Technique
Use an old gift card or plastic scraper to spread paint on your paper. Start by applying acrylic paint in a loose, overlapping way. Then, scrape through the paint with the card to show the layers underneath.
Change the angle and pressure to get different patterns. A plaid effect is really cool!
Watercolor Splatter Effects
For a unique, abstract look, use liquid watercolors. Make them runny by adding water. Dip your brush, then flick it on the paper for a speckled design. Try different colors and add metallic gold splatters for extra flair!
These techniques dry fast, so you can wrap gifts quickly. Impress your loved ones with your unique diy wrapping paperand creative gift presentation!
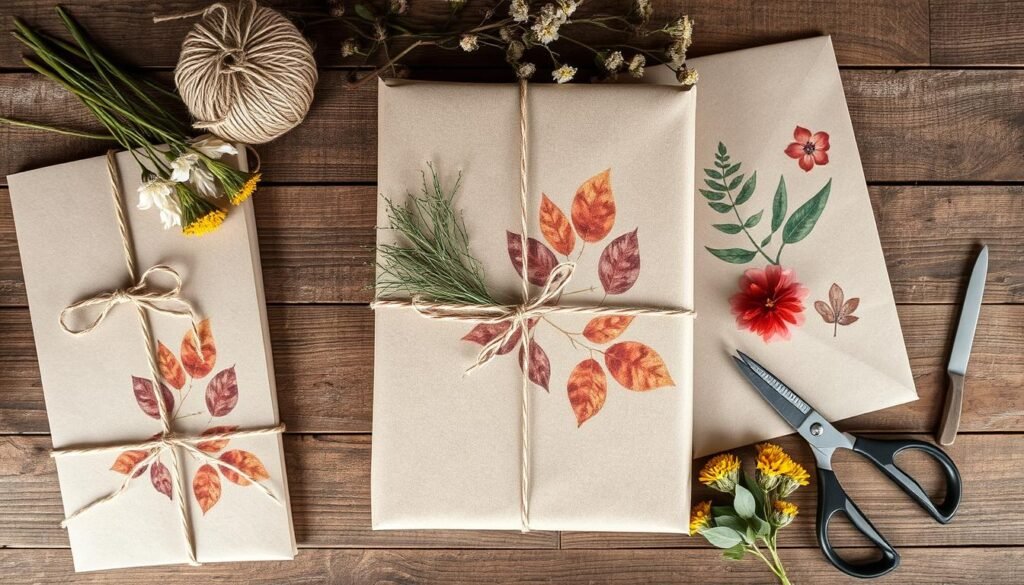
Eco-Friendly Wrapping Paper Alternatives
It’s easy to make your gift wrap eco-friendly! Use paper bags from stores as wraps after decorating them. Fabric scraps or old scarves can be used for furoshiki-style wrapping. Even newspaper can look stylish with some decorations. It’s all about being creative and cutting down on waste. Plus, your eco-friendly friends will appreciate the effort!
Shiny colored wrapping paper is often not recyclable, but brown/kraft paper is. You can find fabric at thrift stores for low prices. Parchment paper is great for wrapping gifts and can be reused for baking. You can also make your own patterned wrapping paper by ironing tissue paper between wax paper.
For eco-friendly gift wrap, think about using reusable containers like Lush’s shampoo bar tins. Newspaper can be repurposed for wrapping, like painting it for a craft. Even chip bags can be washed and turned inside out for wrapping small gifts.
- Wrapping a present in a reusable produce bag adds a practical and eco-friendly touch.
- Baskets from thrift stores are cost-effective and practical for gift-giving.
- Children’s artwork can be repurposed as unique eco-friendly wrapping paper.
- Stacking boxes inside each other can create gift illusions and utilize boxes from online shopping.
- Clay flower pots can be used as gift containers, decorated with fabric or twine for an eco-friendly presentation.
By trying these eco-friendly wrapping paper alternatives, you can help the planet and make your gifts special. It’s a win-win for everyone!
Professional Tips for Perfect Gift Presentation
Improving your gift wrapping skills is simpler than you might think. With a few easy tricks, you can turn simple gifts into stunning works of art. The trick? Focus on the corners, edges, and details.
Corners and Edges
Using a hot glue gun is key for sharp corners and edges. Say goodbye to messy tape lines and uneven folds. Just apply hot glue along the edges for a smooth finish.
Ribbon and Bow Placement
Ribbons and bows make any gift special. Experiment with different textures and sizes for a unique look. Place them thoughtfully to balance your design. A big bow or embellishment can anchor the look. Try using wooden shapes like anchors or stars as ornaments. They add a personal touch after the gift is opened.
With these gift wrapping tips and a bit of creativity, your gifts will look magazine-perfect. It’s simpler than you think. So, let your gift wrapping skills shine!
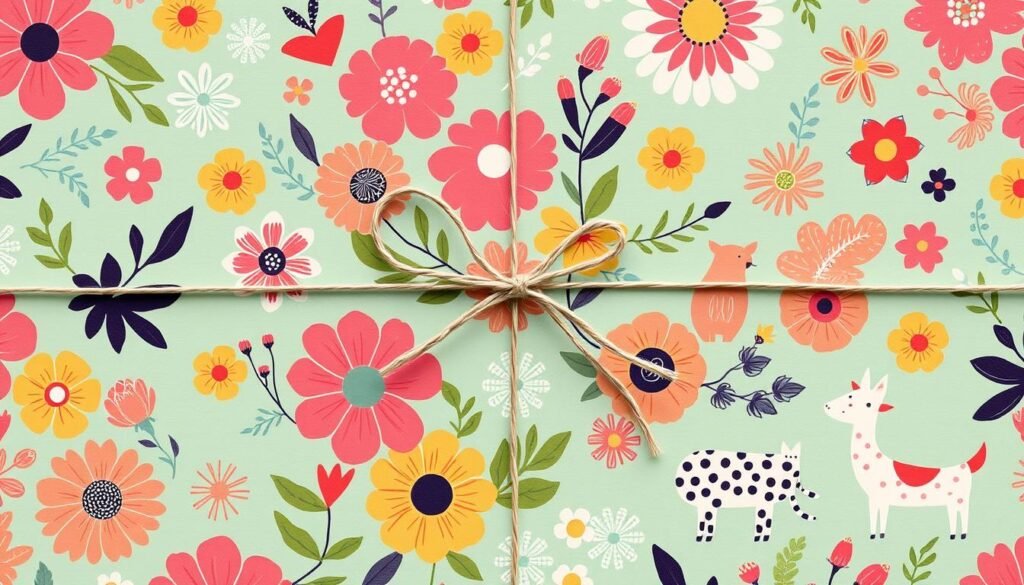
Seasonal and Holiday-Specific Design Ideas
Make your gift-giving special with custom wrapping paper for each season or holiday. Whether it’s Christmas, Valentine’s Day, or a summer birthday, you can create something unique. There are countless ways to make your wrapping paper stand out.
In winter, use bold red and green splatter paint on kraft paper. This adds a rustic charm to your holiday gifts. For spring, try delicate floral patterns or pastel watercolors for a fresh look. Summer birthdays call for bright, tropical designs like pineapples and palm leaves.
DIY gift wrap lets you match the wrapping to the recipient’s interests or the event’s theme. Adding personal touches, like their favorite colors or hobbies, makes the gift even more special. So, get creative and enjoy the many holiday gift wrap and custom wrapping paper ideas out there!
Creating unique gift wrap is all about being creative, no matter the season or occasion. Why not make your own custom wrapping paper? It’s a fun and rewarding way to add a personal touch to your gifts.
Storage and Preservation Tips
Making your own diy wrapping paper is rewarding. But, it’s key to store and preserve it well. You wouldn’t want your beautiful, handmade gift wrap to waste. Here are some tips to keep your paper crafts looking great:
- Store flat sheets of diy wrapping paper between tissue paper to avoid creases.
- For rolled paper crafts, use old mailing tubes or dedicated holders to keep them safe.
- Keep your diy wrapping paper in a cool, dry place to avoid fading or moisture damage. Direct sunlight can make colors fade.
- If you’ve made extra paper crafts, frame a piece as a unique art for your home. It’s a great way to preserve your creativity and add a personal touch to your decor.
By following these simple tips, your handmade diy wrapping paper will stay beautiful for years. Proper care and storage let you enjoy and share your paper crafts with loved ones for many occasions.
| Storage Method | Advantages | Disadvantages |
|---|---|---|
| Flat Sheets Between Tissue Paper | Prevents creasing and wrinkling | Requires more storage space |
| Rolled in Mailing Tubes | Saves space, protects from damage | Potential for spiral marks or creases |
| Cool, Dry Storage Area | Maintains color and paper quality | Limited access and visibility |
| Framed as Wall Art | Preserves and displays creative work | Requires additional investment |
Proper storage and preservation techniques will ensure your handmade paper crafts stay in pristine condition for years to come.
Common Mistakes to Avoid
Making your own gift wrapping paper is fun and rewarding. But, it comes with its own set of challenges. I’ve been there and tried it all. Here are a few common mistakes to avoid for a smooth DIY wrapping paper experience.
First, don’t overdo it with the paint. While bright colors and patterns are great, too much paint can make the paper stiff. This makes it hard to wrap gifts neatly. Start with a thin layer and add more gradually for the best look and feel.
Another mistake is rushing the drying process. Homemade wrapping paper needs patience. If you wrap gifts before it’s fully dry, you’ll get smudges and smears. This isn’t the professional look you want.
- Tip: Give your creations plenty of time to dry before using them.
- Protip: Use a hairdryer on a low setting to speed up drying if you’re short on time.
When it comes to embellishments, be careful with glitter. A little goes a long way. Too much glitter can make your gift wrap look messy.
Lastly, always double-check your measurements before cutting the paper. Running out of paper can be frustrating. Measure twice, cut once for perfectly sized wrapping paper every time. Remember, gift wrapping tips and tricks take practice. Don’t worry if your first tries aren’t perfect. With a bit of trial and error, you’ll soon be wrapping like a pro!
Conclusion
There you have it, friends – your complete guide to making amazing DIY diy wrapping paper! We’ve shown you many fun ways to make your creative gift presentation stand out. The fun is in the making, not just the end result. Your handmade wrap will make any gift special. It shows your loved ones how much you care.
So, get your supplies ready, put on some music, and let your creativity shine. Use plain brown kraft paper to create custom tags and textures. Add natural embellishments to make your gifts even more special.
Whether it’s for the holidays or any other celebration, your homemade gift wrap will wow everyone. Happy wrapping! Don’t forget to share your creations – I’d love to see what you make! Your DIY projects will inspire others to be creative. Let’s make gift-giving even more special by crafting together.


